Schedule Control
Adding a Schedule
To create a scheduled task, you can follow the instructions below
Note:
If you want to use the schedule function, please make sure OMS and the affected devices are connected to the LAN at the scheduled time frame and turn off hibernation on your computer to make OMS run well.
Here are the steps to setup device or group schedule, respectively.
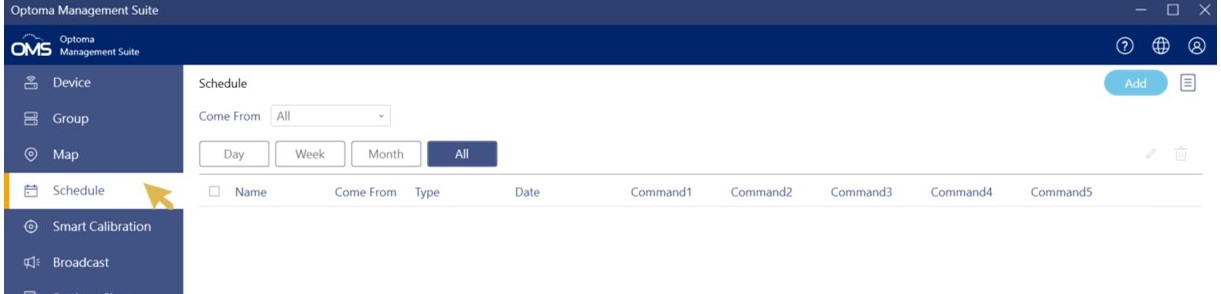
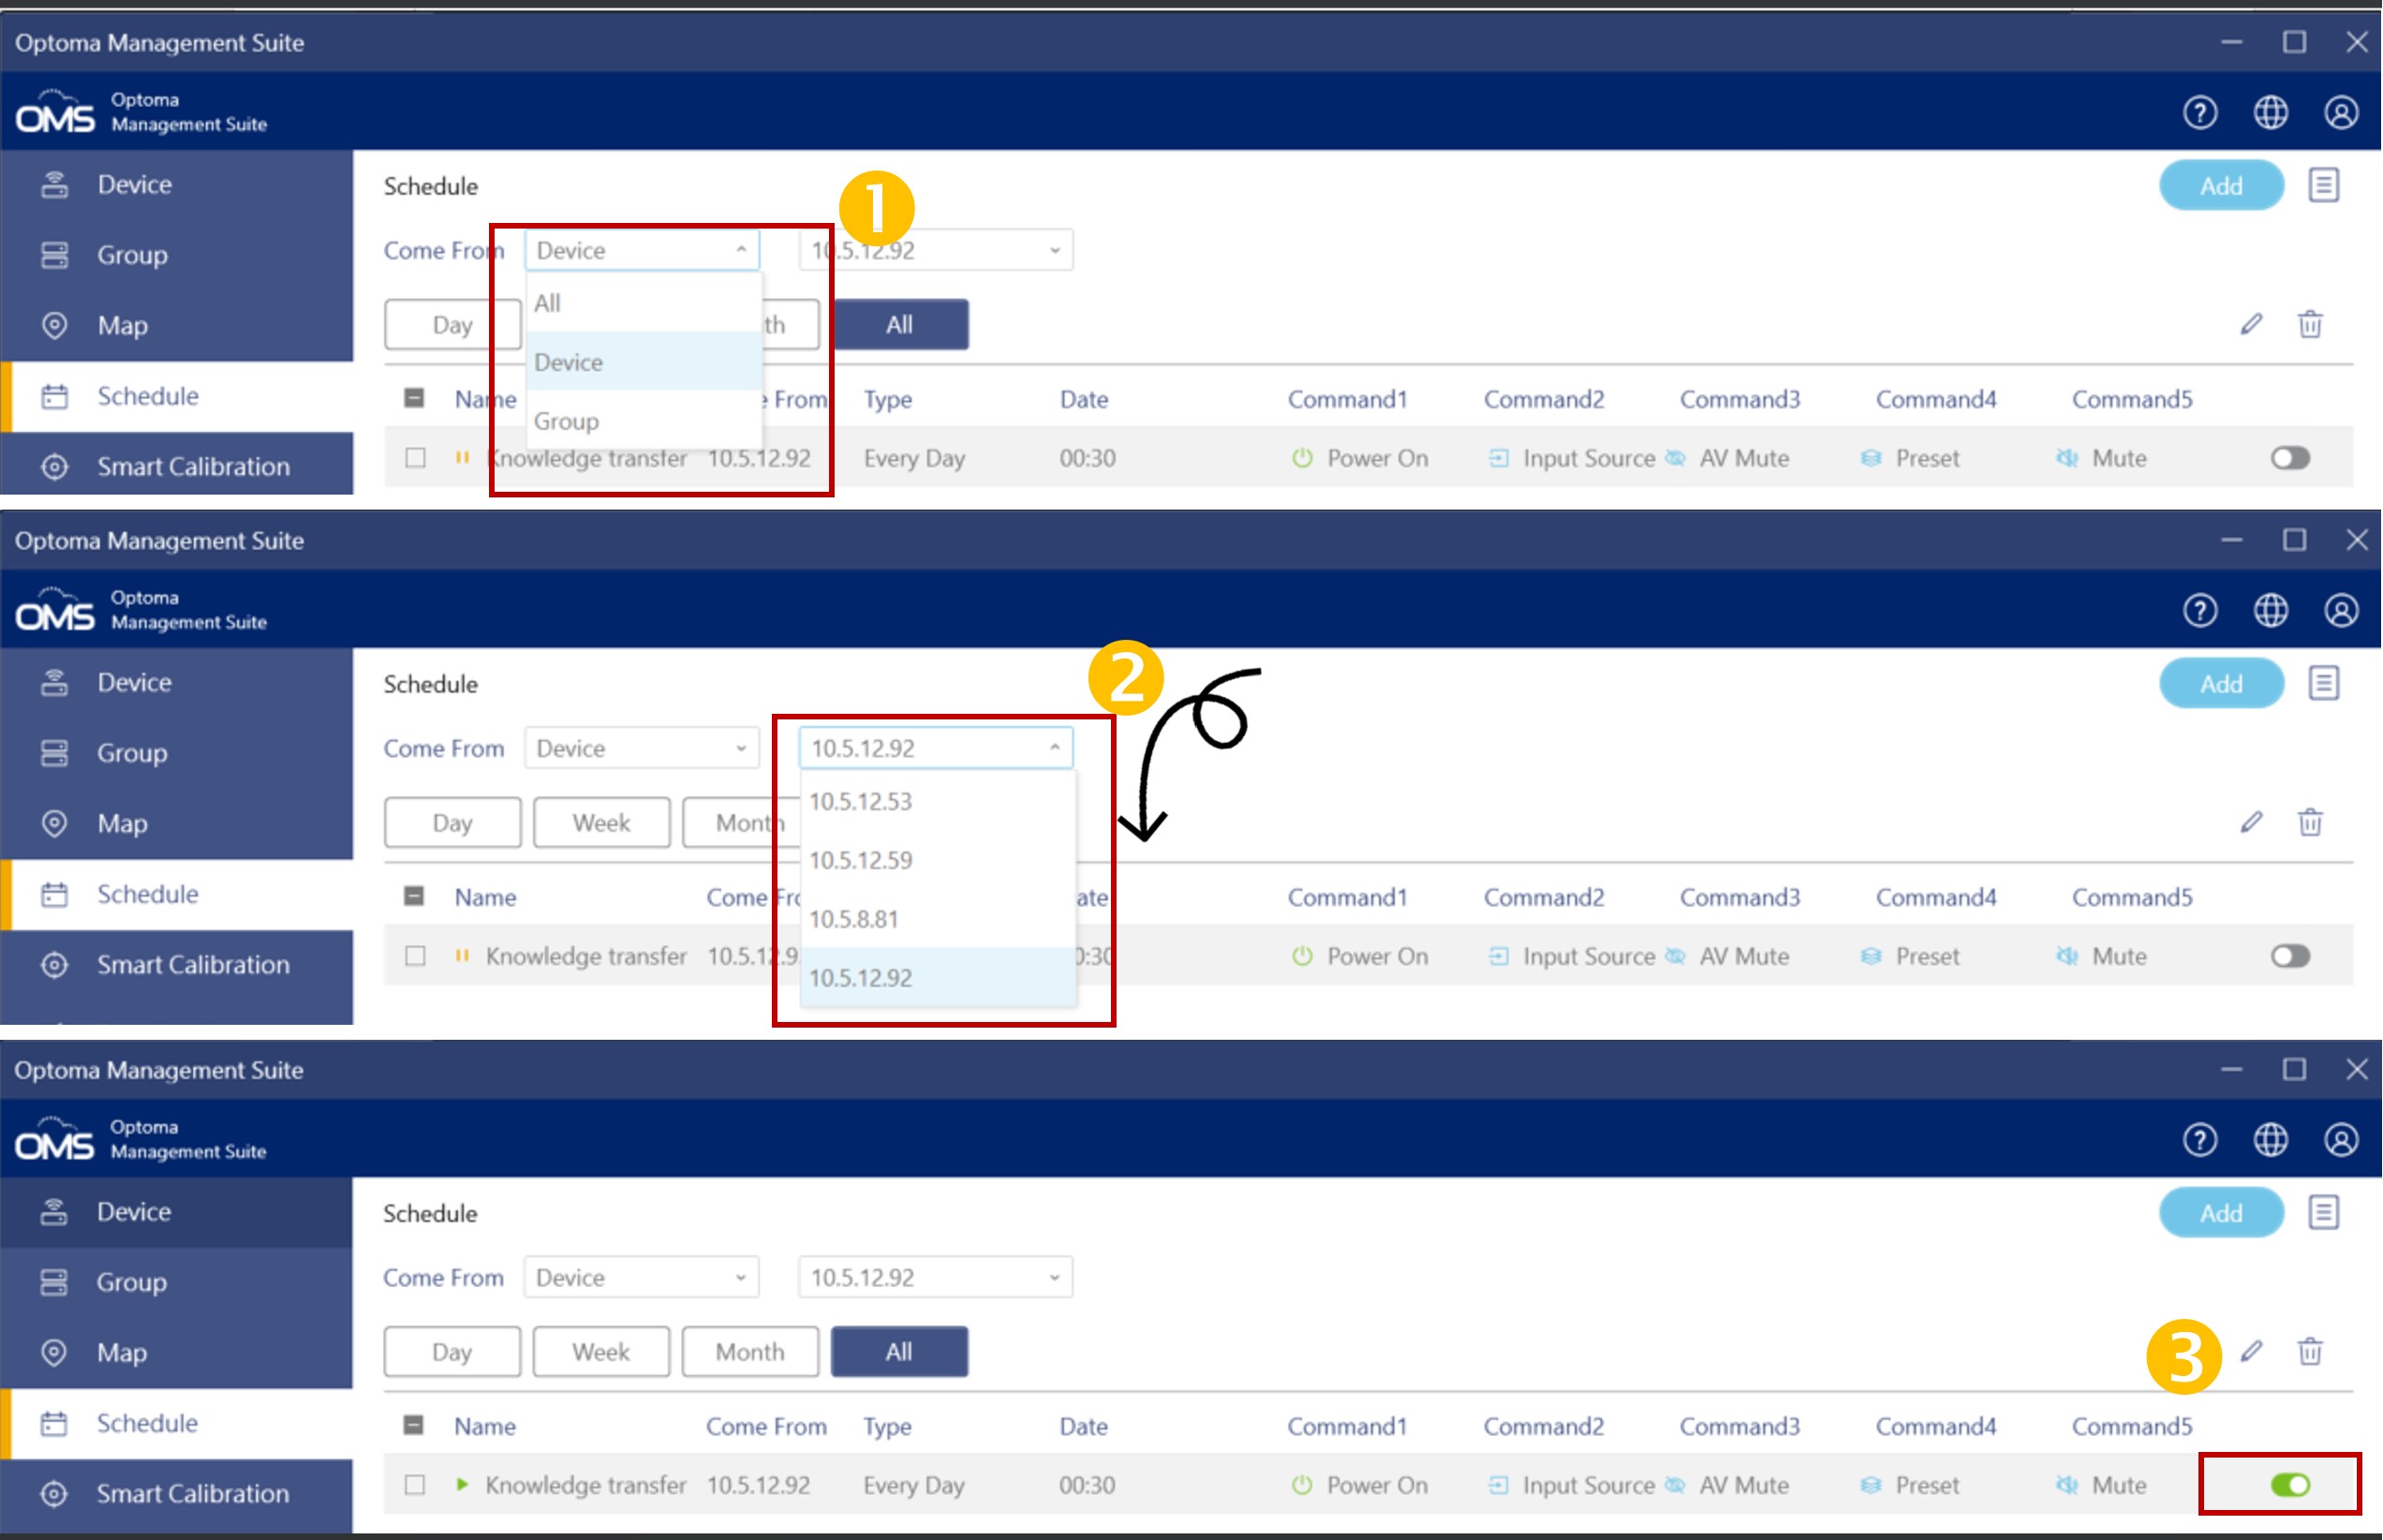
1. From the left panel, right-click on the schedule to open the schedule-setting function and the default view is “All” view for all schedule including Day, Week and Month schedule.
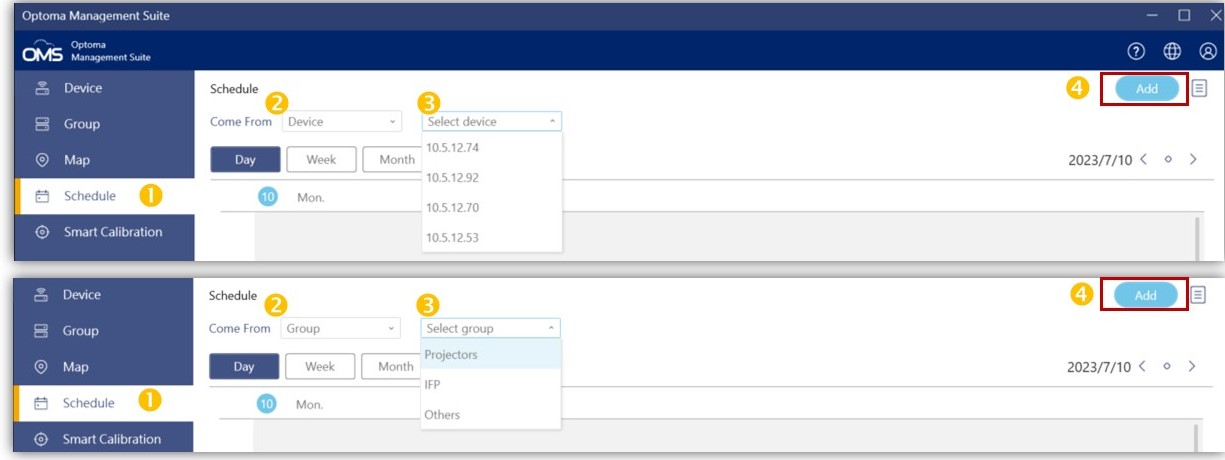
2. Choose one value from the drop-down list of Come From and you can designate the target such as device or group to set up a schedule.
3. Once the device or group is chosen, the corresponding drop-down menu will display a list of values, from which the user may select one, for example, a device, or a group.
4. After a device or a group is selected, click the “Add” button to add new schedule.
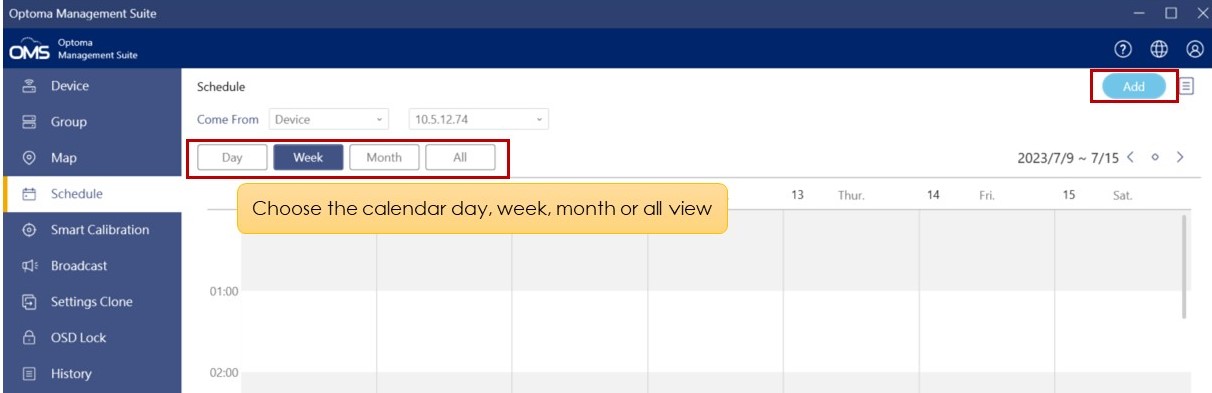
Open the calendar and set the schedule tasks as follows:
Set up a scheduled task
1. Click the icon(![]() )to set scheduled tasks.
)to set scheduled tasks.
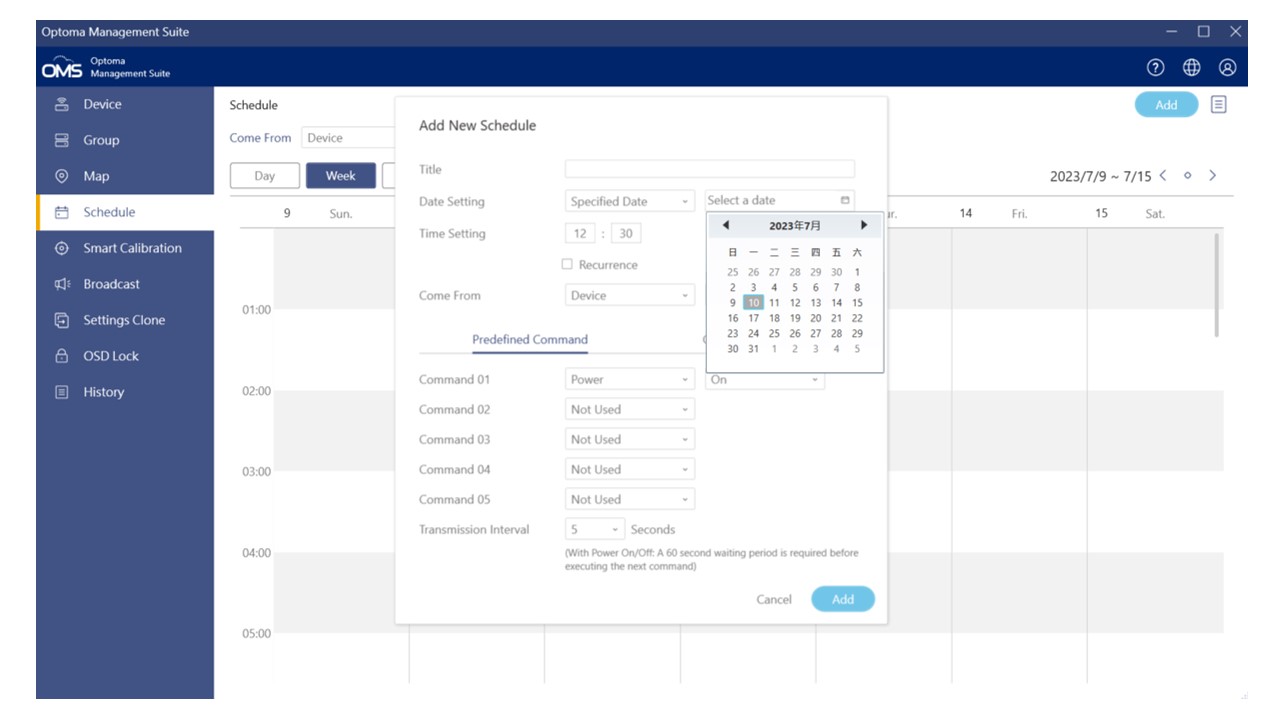
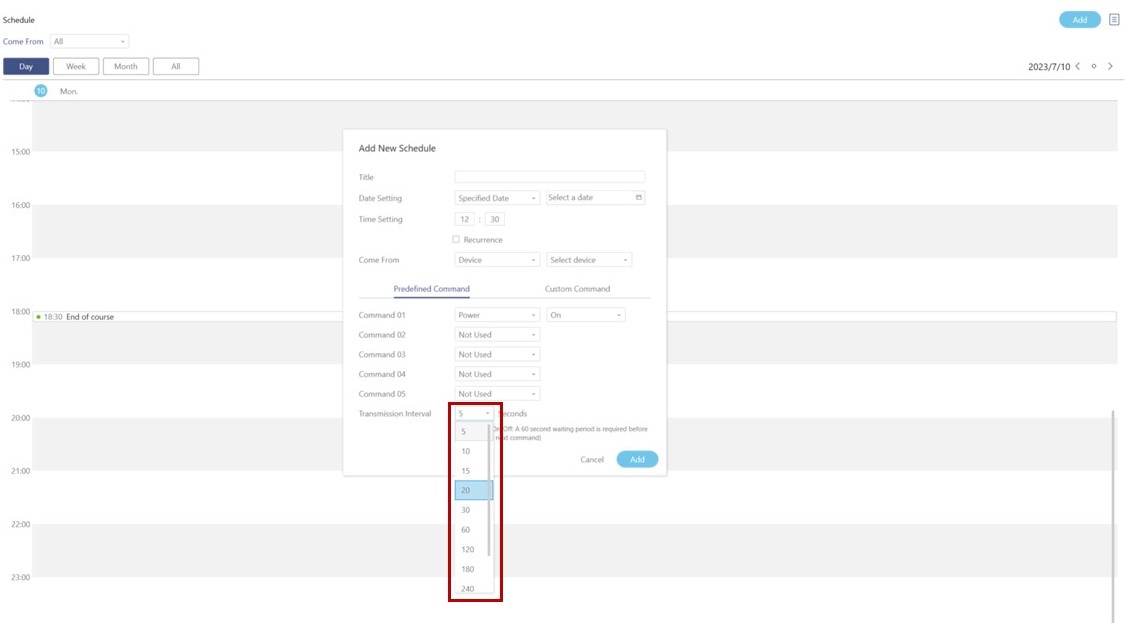
2. You can see the Add New Schedule window.
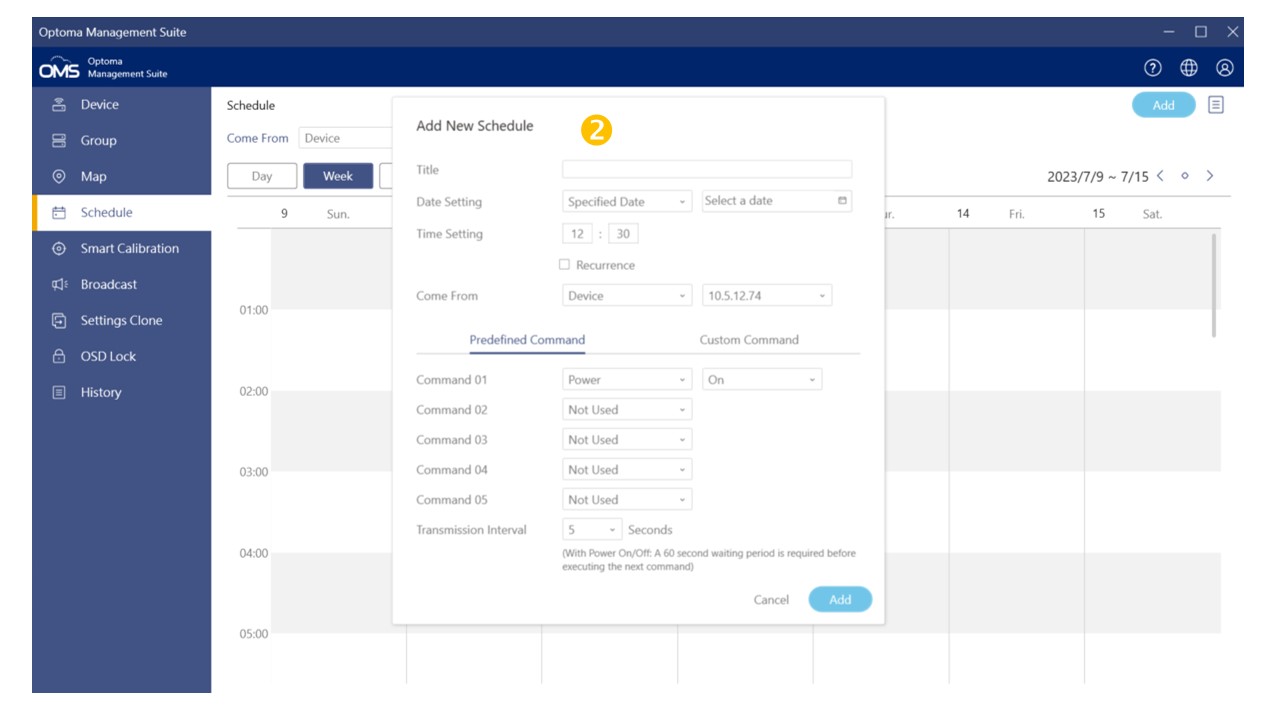
3. Select Specified Date to set the schedule on a specific date.
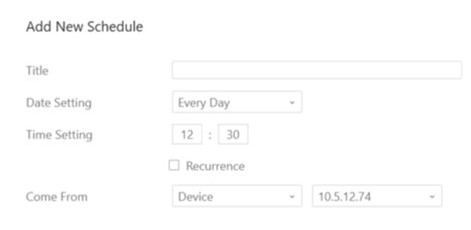
• Select Every Day to set the daily schedule.
• Select Weekly to set the schedule on the selected day(s) of the week.
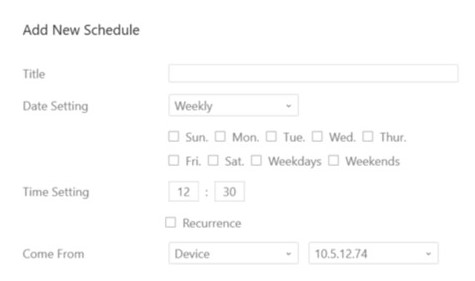
• Recurrence option: To tick Recurrence to create a recurring scheduled event.
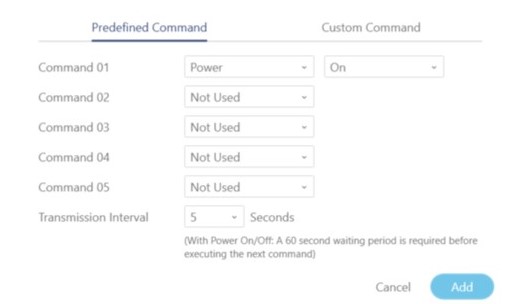
On the Predefined Command tab, click the respective drop-down menu to select the command(s) to be activated at the preset schedule.
Note:
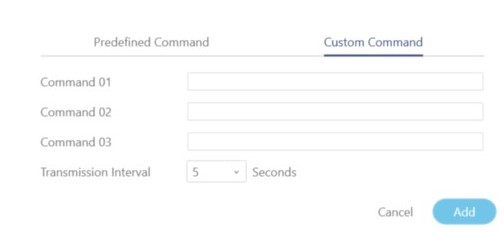
• You can also manually enter the RS232 or PJLink command by selecting the Custom Command tab.
• With Power On/Off command, a 60 second waiting period is required before execution of the next command.
• For more information, please refer to Optoma Protocol documentation and PJLink protocol documentation.
Set the transmission interval time (period of time between sending each command).
Click Add and the added schedule appears in the calendar view
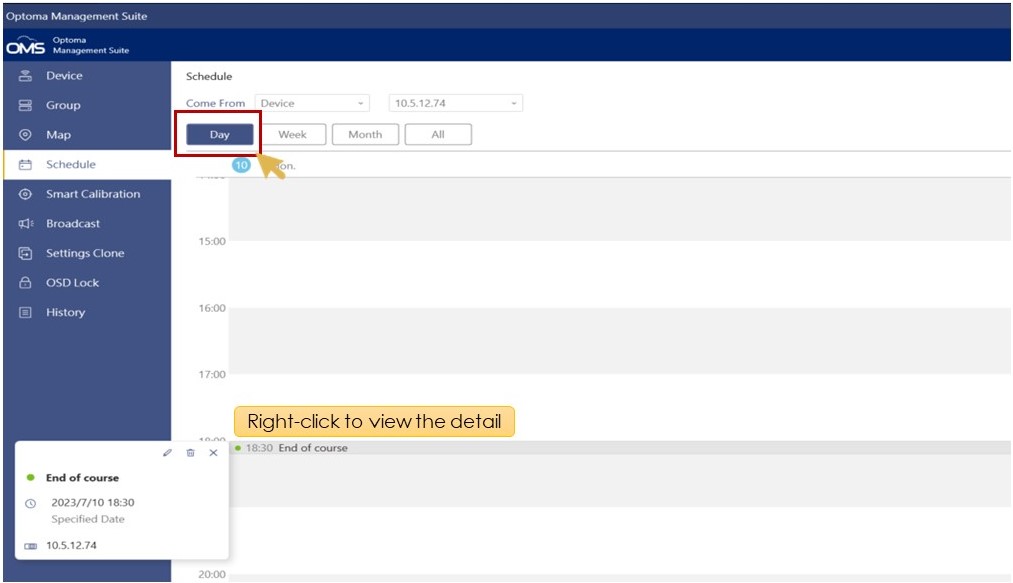
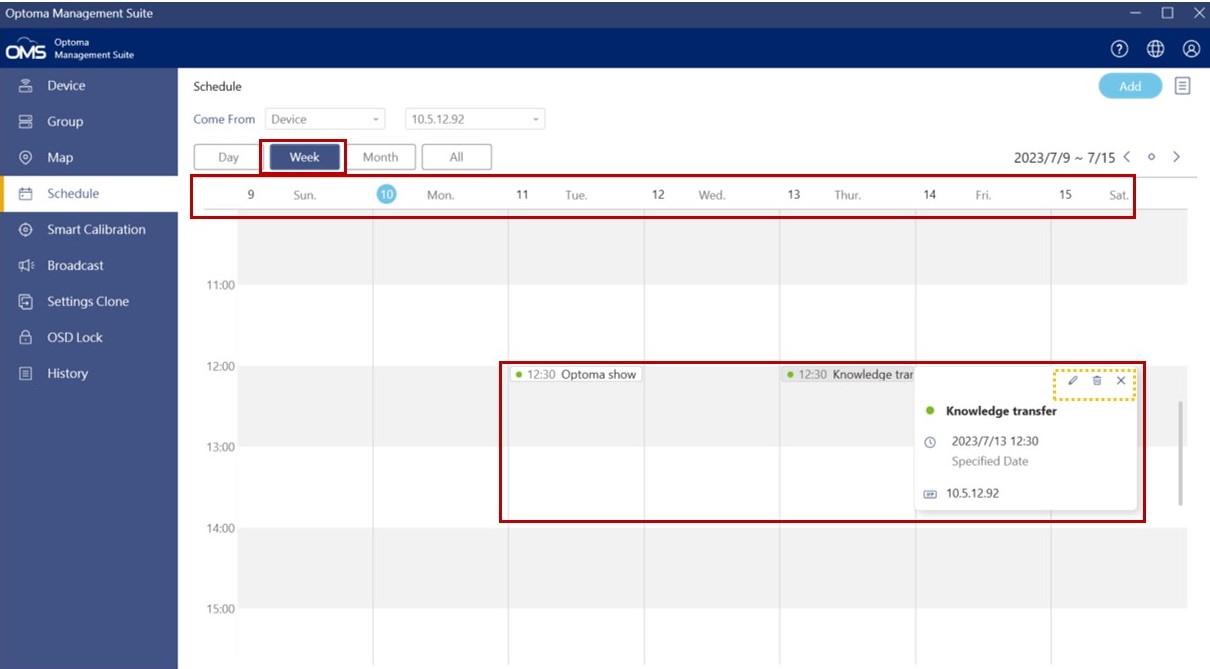
1. Day view
Select the Day view to see the 12-hour or 24-hour scheduled tasks in a day.
• Click “![]() ” to edit the schedule task.
” to edit the schedule task.
• Click “![]() ” to delete the schedule task.
” to delete the schedule task.
• Click “![]() ” to close the window.
” to close the window.
2. Select the Week view to see the scheduled tasks from Monday to Sunday.
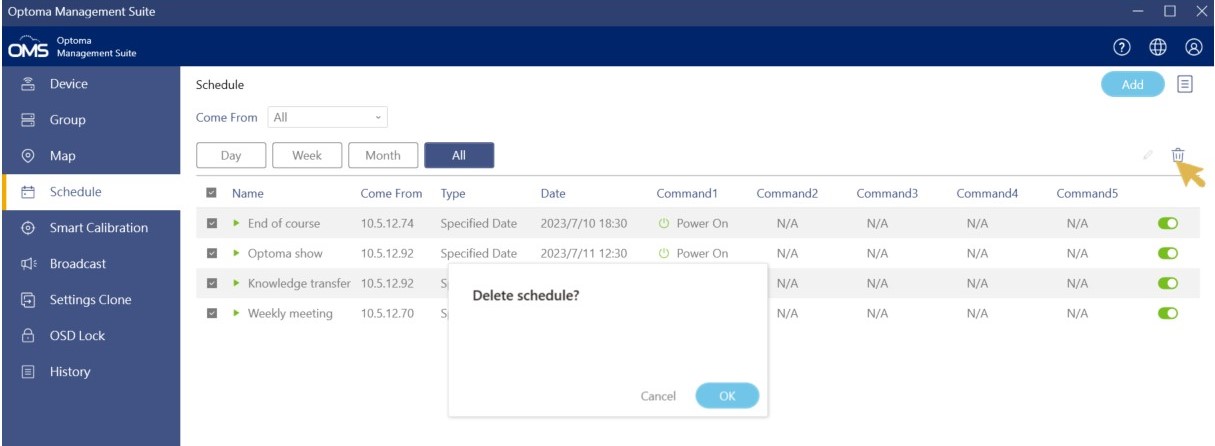
3. Select the All view to see a detailed list of scheduled tasks
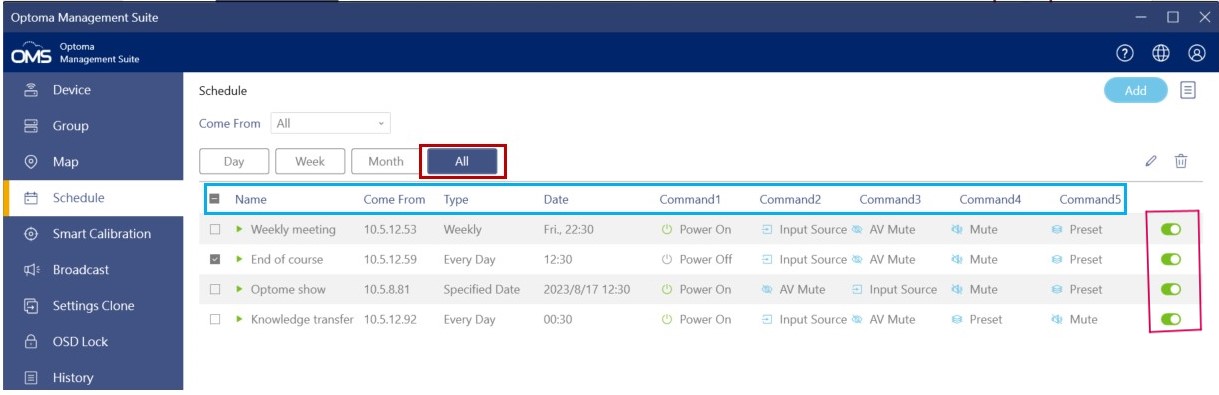
| Item | Description |
| Name | Schedule task name |
| Come from | Device name |
| Type | Schedule date: Every Day, Weekly, Specified Date |
| Command 1,2,3 | Command type |
To enable or disable scheduled tasks:
• display the list box of Come From dropdown list
• choose the devices you want
• click ![]() to enable or disable scheduled tasks
to enable or disable scheduled tasks
Select the device to Edit![]() or Delete
or Delete![]() the scheduled tasks.
the scheduled tasks.