
Quick Tour
Control panel
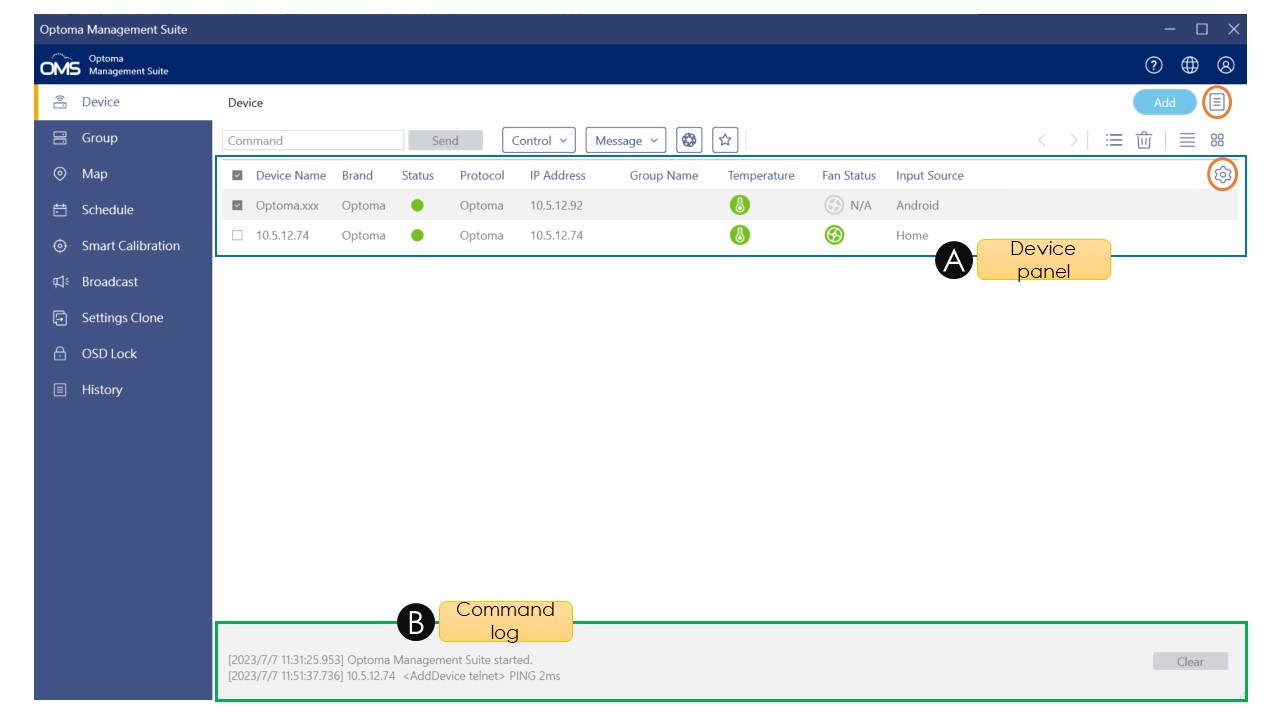
| No | Item | Description | |
| A | Device panel | Monitor the status of the devices through the device panel. | |
| Filter Click the filter to select the items of the device view. |
|||
| B | Command log | Command history and response log | |
| History Click the history icon to view command results |
|||
Control the device
From the upper left corner of the main page, you can select general control or map control panel to control the device.
General Control
Just select the device and click the desired function option, the details are as follows.
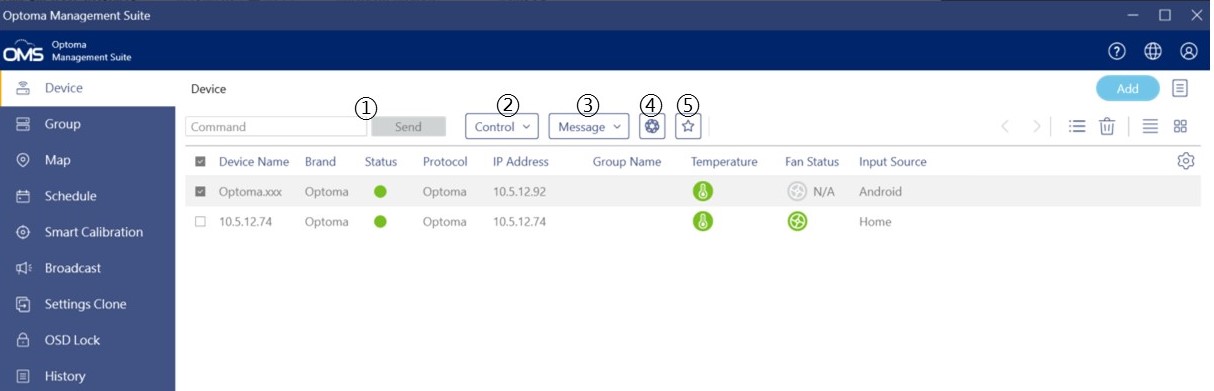
| No | Item | Description |
|---|---|---|
| 1 | Command: Control the device by using the RS232 command or PJLink Command. Enter the command and click Send. Note: For more information, please refer to Optoma RS232 command control documentation or PJLink. **PJlink can only be used if the device supports it |
|
| 2 |
|
• Power on: Click to power on the device. • Power off: Click to power off the device. |
| • Wake on LAN Click to enable Wake on LAN Power on the device remotely or wake it from Standby mode. Note: 1.WOL compatibility depends on device conditions. 2.To use Wake-On-LAN, please • Turned on the device and connect to the network via LAN (RJ45). • To Wake-On-LAN, please make sure your devices and computer are connected to the same local area network via LAN port. |
||
| • Input Source Click to switch the input source. Note: 1. Some input sources may not support all devices, please check your device related specifications. 2. This command is not supported by PJLink |
||
| • AV Mute On: Click to disable the AV mute function. • AV Mute Off: Click to enable the AV mute function. When enabled, the system blanks the image and mutes the audio. |
||
| • Mute Off: Click to enable the mute function. When enabled, the system mutes the sound temporarily. • Mute On: Click to disable the mute function. |
||
| 3 |
|
Broadcast Message Send: Click to send the message function (Up to 30 English characters) Clear: Click “Stop” to clear the sent message Note:
If there is no message on the screen, the OSD menu will pop up |
| 4 | Lens Settings Configure the lens settings to adjust the image quality and position. Please check details here. |
|
| 5 | Customized control Click to add specific control icons for immediate command. |
|
 |
||
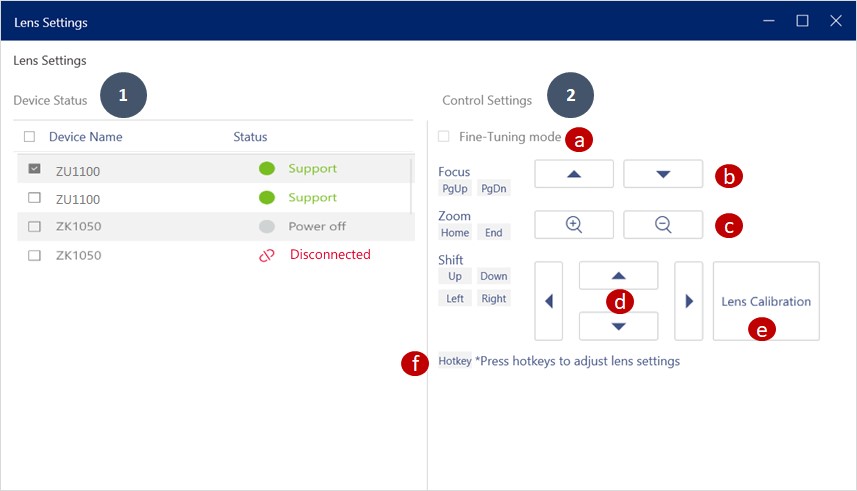
Lens Settings
Configure the lens settings to adjust the image quality and position
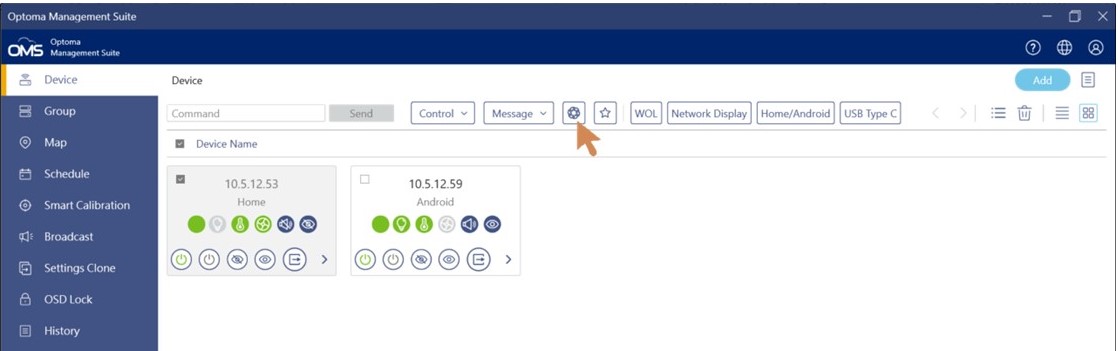
- Device status
• The device list will show status including supported, not supported, power status, connection status…
• Please select the device/s first to use the lens setting function. - Control settings
• Fine-Tuning mode : Small movement adjustments. If fine-tuning is required, please tick it.
• Focus : Use the and
and  buttons to adjust the focus of the projected image.
• Zoom : Use the and
and  buttons to adjust the size of the projected image.
• Lens Shift : Use the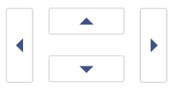 buttons to adjust the lens position to shift the projected area
• Lens Calibration : Calibrate the lens position to return it to the center. To prevent damage to the projector and the lens, always perform lens calibration before replacing the lens.
Note: Lens Calibration Not compatible with UST lenses
• Hotkey : Easily adjust lens settings by pressing a PC hotkey.


這篇文章有幫助嗎?
如果你覺得這篇文章有幫助,請讓我們知道。