Account and setup
Registration
Optoma Solution Suite offers multiple registration options to cater to different user preferences and requirements. Users can choose from the following registration methods via the link below: https://whiteboard.optoma.com/
- Email Registration: Register with the user’s email address. Users have to provide an email address, create a password, and complete the registration form to create an account on Whiteboard.
- Google Sign-In: Use a Google account to register. This method is more convenient as the user doesn’t need to remember multiple usernames and passwords. To sign in with a Google account, users can click on “Sign in with Google,” which will redirect them to the Google login page, and grant permission to Whiteboard once the authentication is complete.
- Microsoft Sign-In: Using a Microsoft account for registration simplifies the process of managing multiple usernames and passwords. To sign in with Microsoft, users can click on “Sign in with Microsoft,” which redirects them to the Microsoft login page. Upon authentication, permission is granted to Whiteboard.
Account management
Users have the ability to manage and update their account information and display name directly from the Whiteboard website. To do so, navigate to Settings on the website. Additionally, users can delete their account; however, it’s important to note that when a user deletes their account, all sessions created from this account will also be deleted.

Cloud Integration Settings
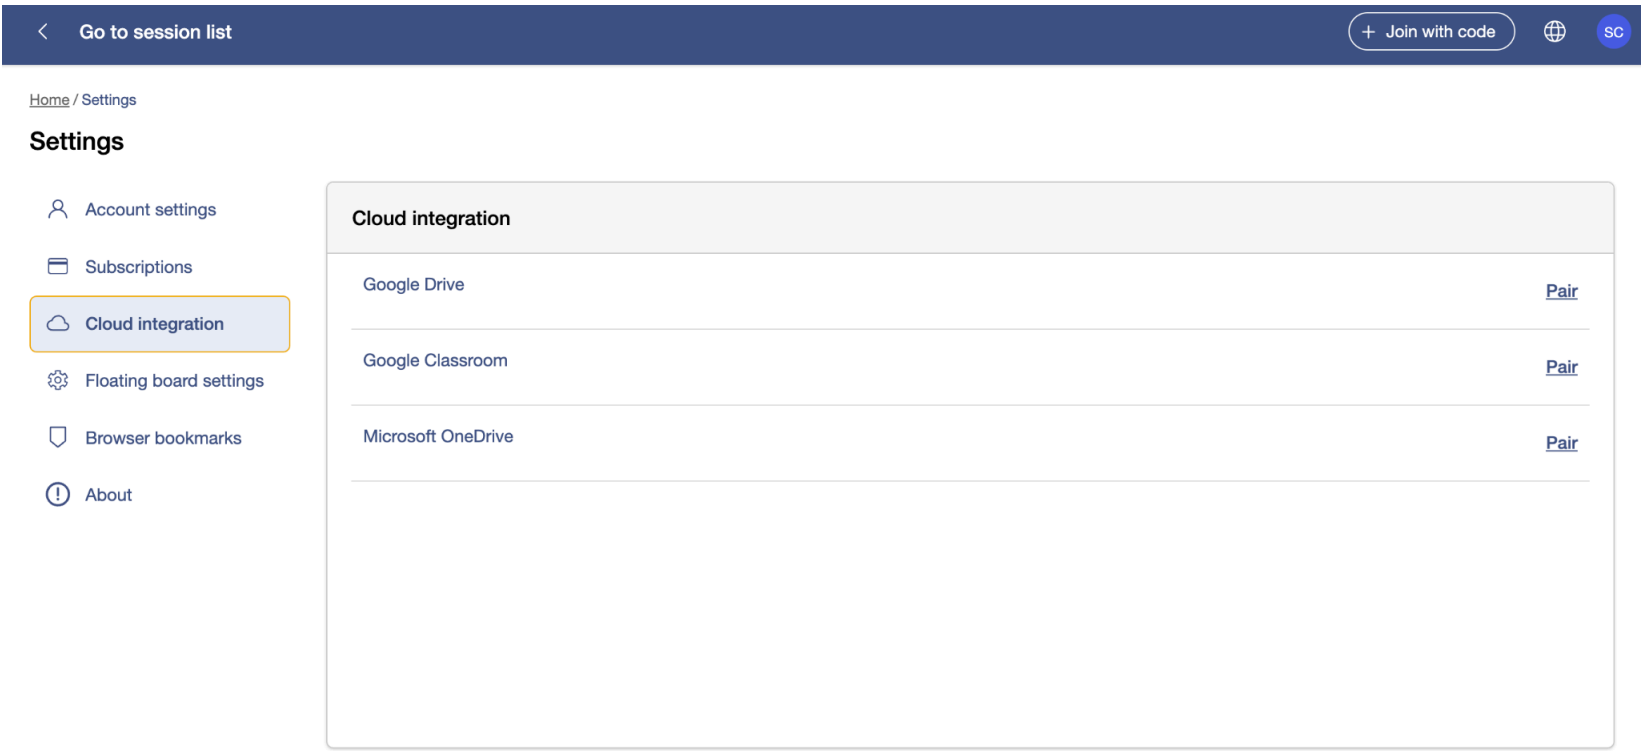
Cloud Service Integration Settings enable users to connect their Whiteboard account with popular cloud storage and other services, such as Google Drive and Google Classroom. This facilitates seamless access to users’ cloud files and enables easy sharing and collaboration with others. Users can link and unlink their cloud services with Whiteboard as needed.
Customization
Tool order on the Floating Toolbar
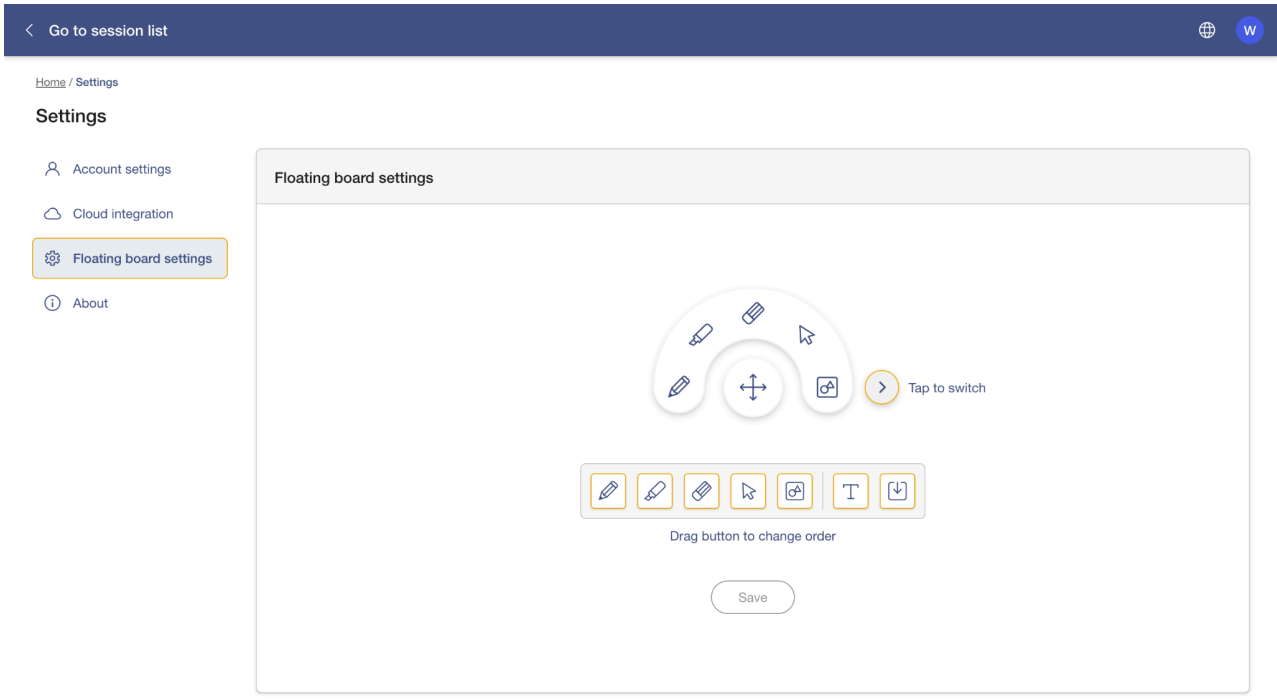
Users can customize the order in which the tools appear on the user’s Floating Toolbar. Users can quickly access all of their favorite tools by saving them within personal settings.
Follow the steps below to customize:
- For Android version: Menu > Settings > Floating Board > Floating Board customization > Drag and drop the icons to change the order. The user’s customized settings will be saved.
- For Web version: Settings > Floating board settings.
Note: The customization of the floating toolbar on IFPDs and FPs is different from the web version. This means Optoma will save two sets of customized settings.
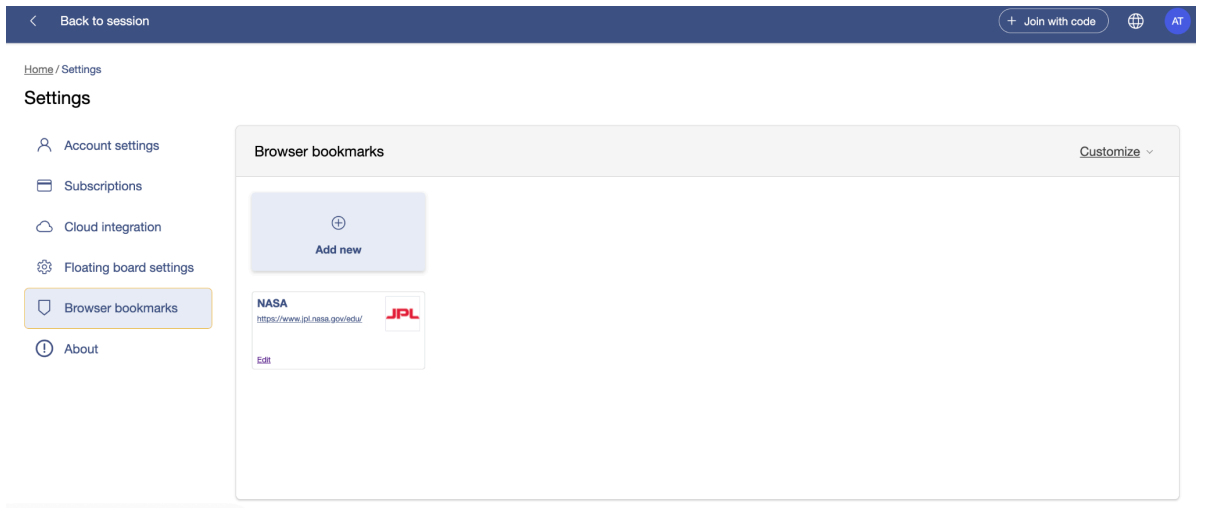
Customization of the Embedded Browser Bookmarks
On the Browser Bookmarks tab, users can add bookmarks and customize their order, or sort them alphabetically. All the bookmark settings will be displayed on the embedded browser of your Optoma IFPD/FP.