
Quick Tour
I. Onboarding Screen
Double click the shortcut icon on the desktop to open Visual Suite. If you are using the software for the first time, it displays a series of onboarding screens, giving you a visualized explanation on how to use the software and what you can do with it.
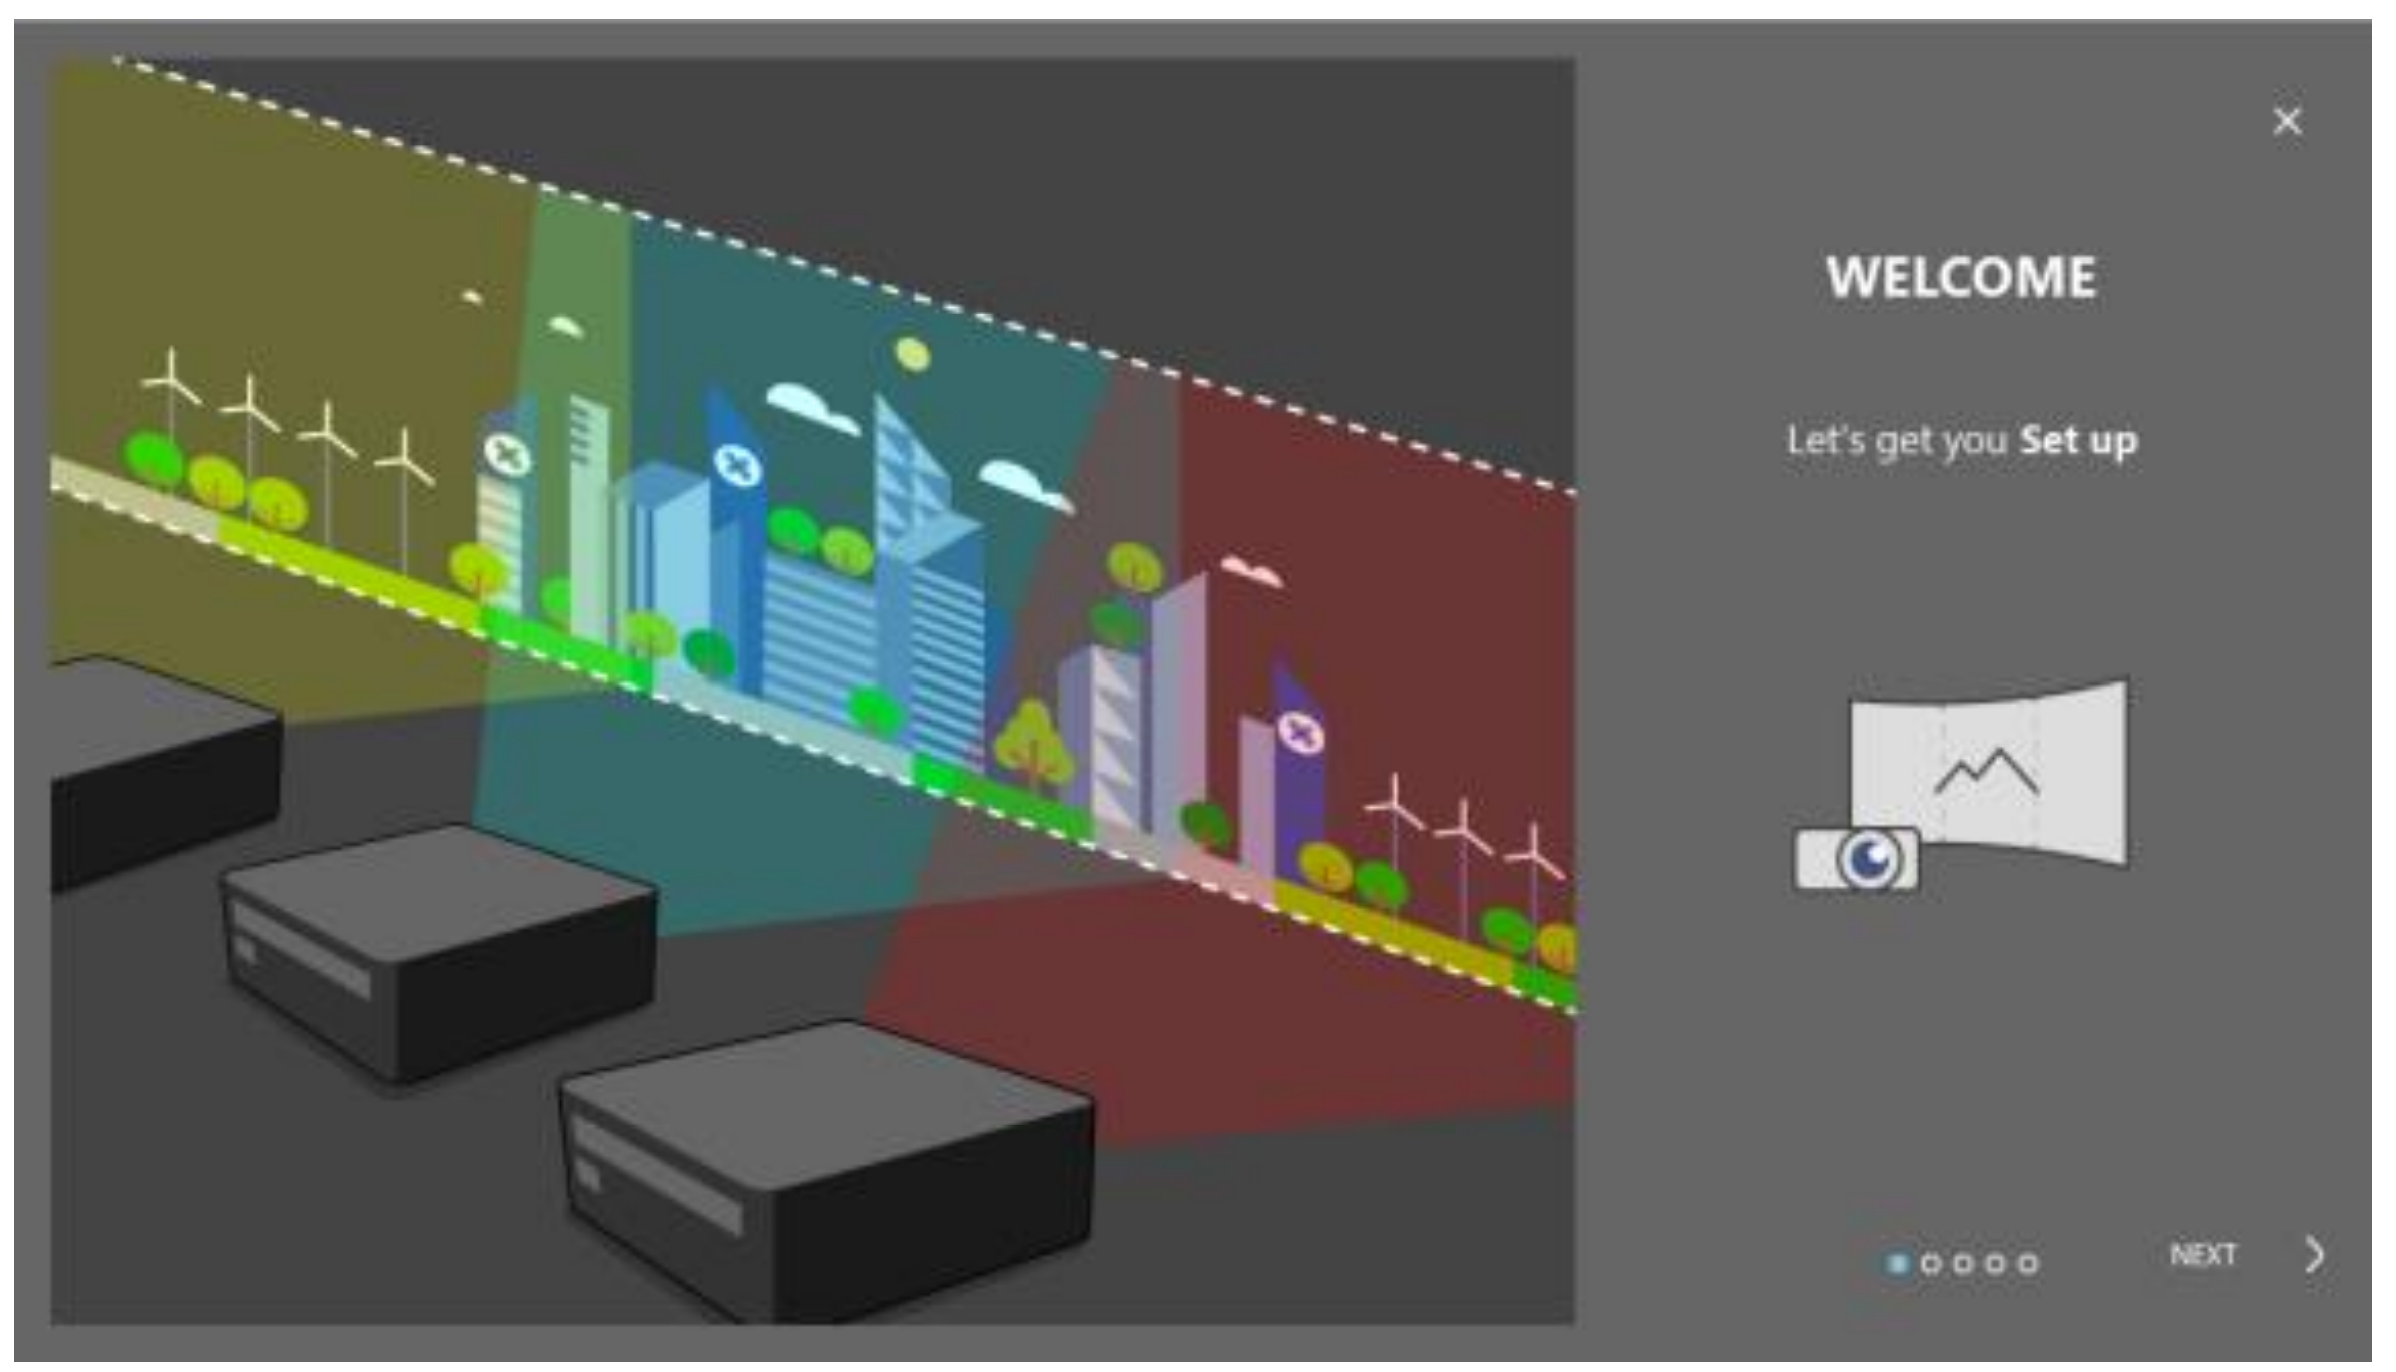
On Boarding Screen
The onboarding screens are skipped after being used once, and you can get it from File > Help > Onboarding Screen.
II. Start page to create the project
Start page to help user create a blending project, the first step is to select the number of projectors which able to perform blending from projector list.
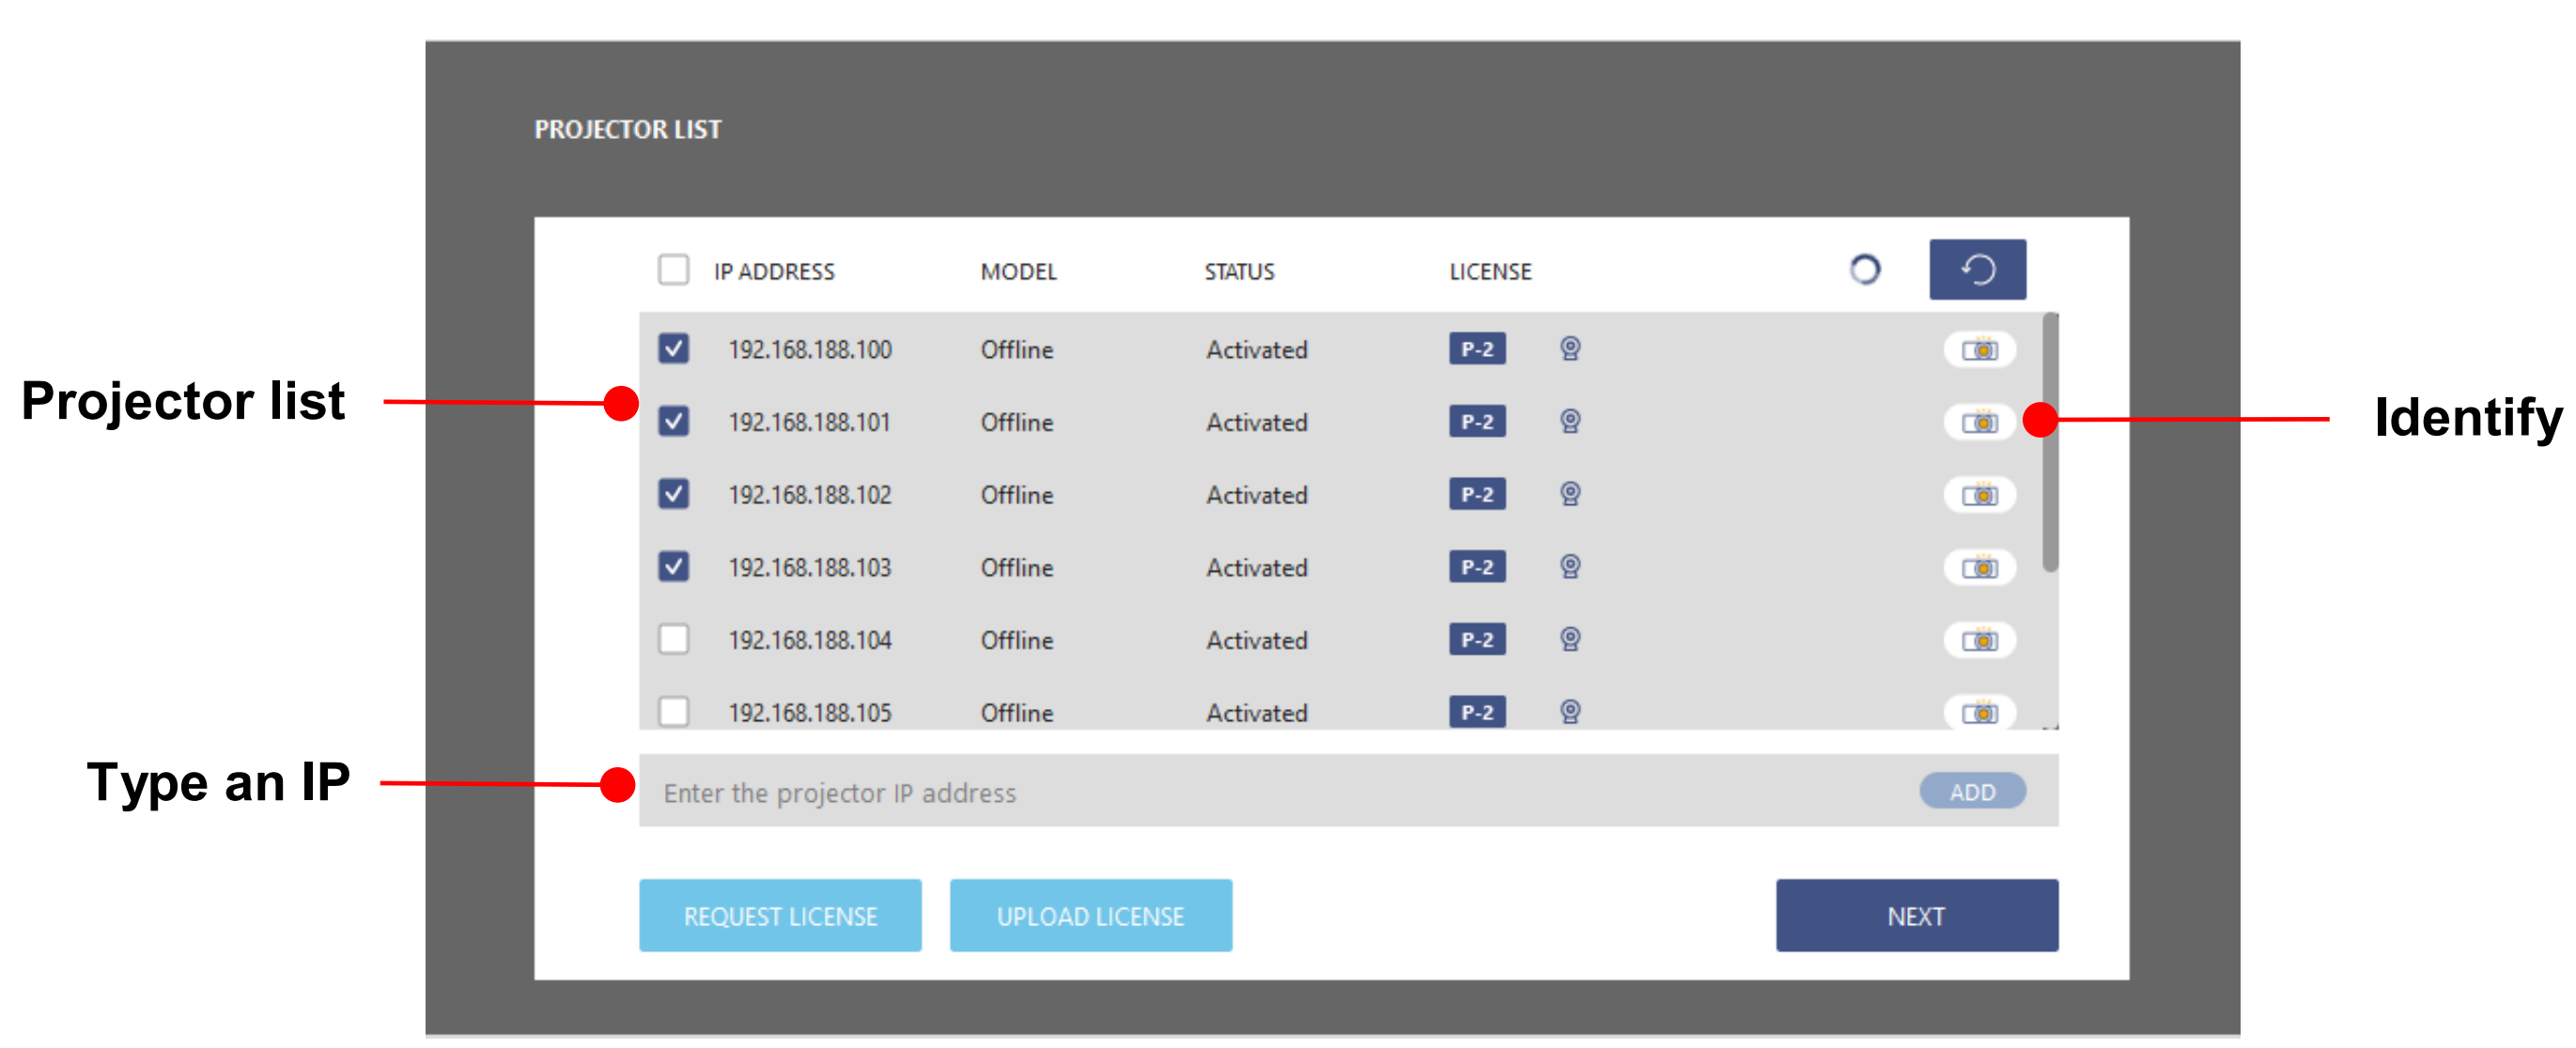
- On the projector list, select the required projectors.
- Visual Suite automatically searches for the projectors in the same network. This may take few seconds.
- To manually add a projector, at the Type Projector IP Address filed, type the IP address and click ADD.
- To locate a projector, click the Identify button to project a white test pattern. Click the button again to turn off the test pattern.
- Note: The license feature is design for grant new feature permission, for more information please consult the Optoma service window.
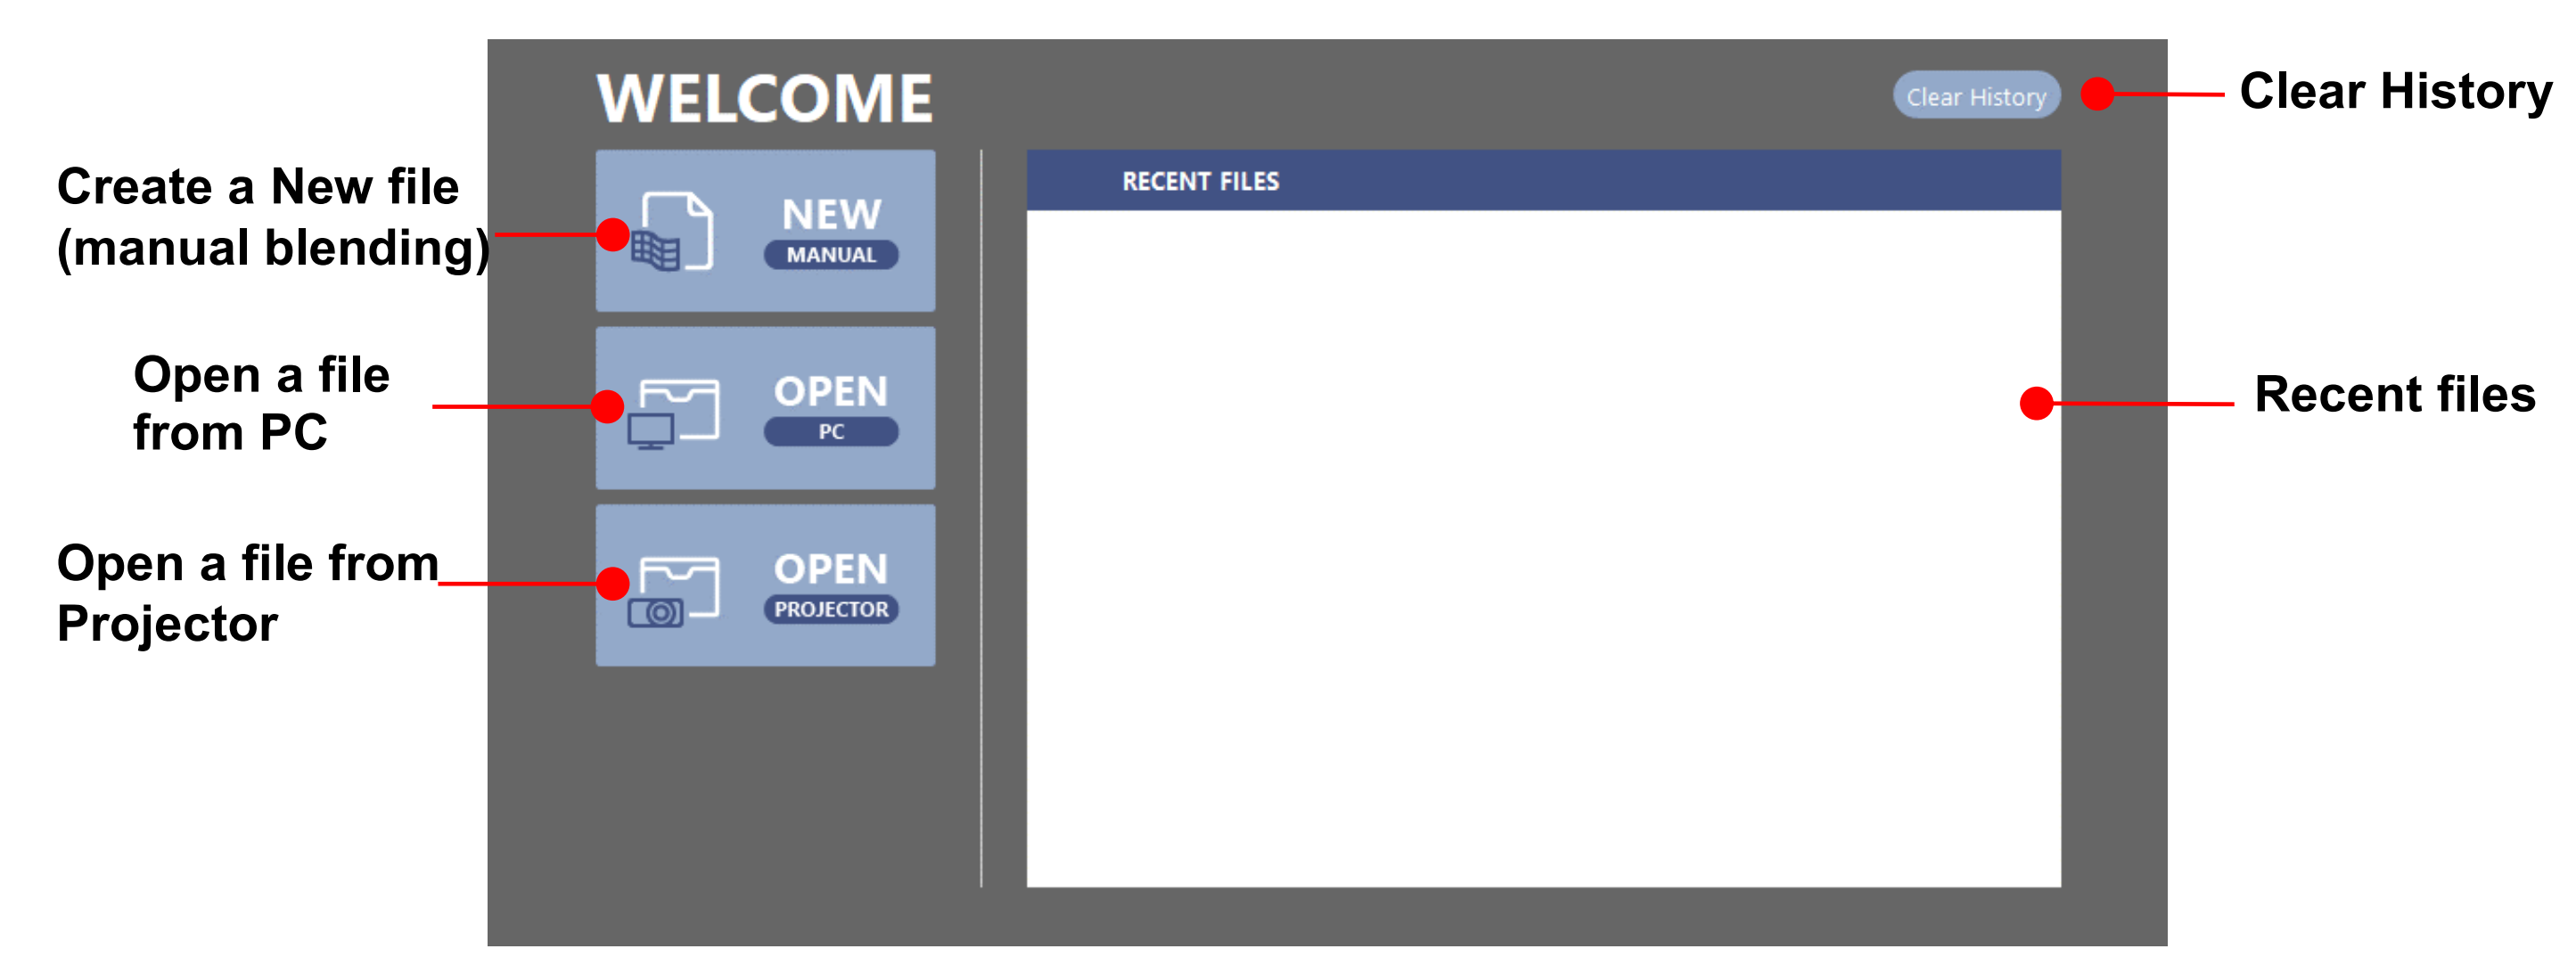
After the start page, Visual Suite redirects to the page where user can create a New file or Open a previous configuration file.
Setting the project file name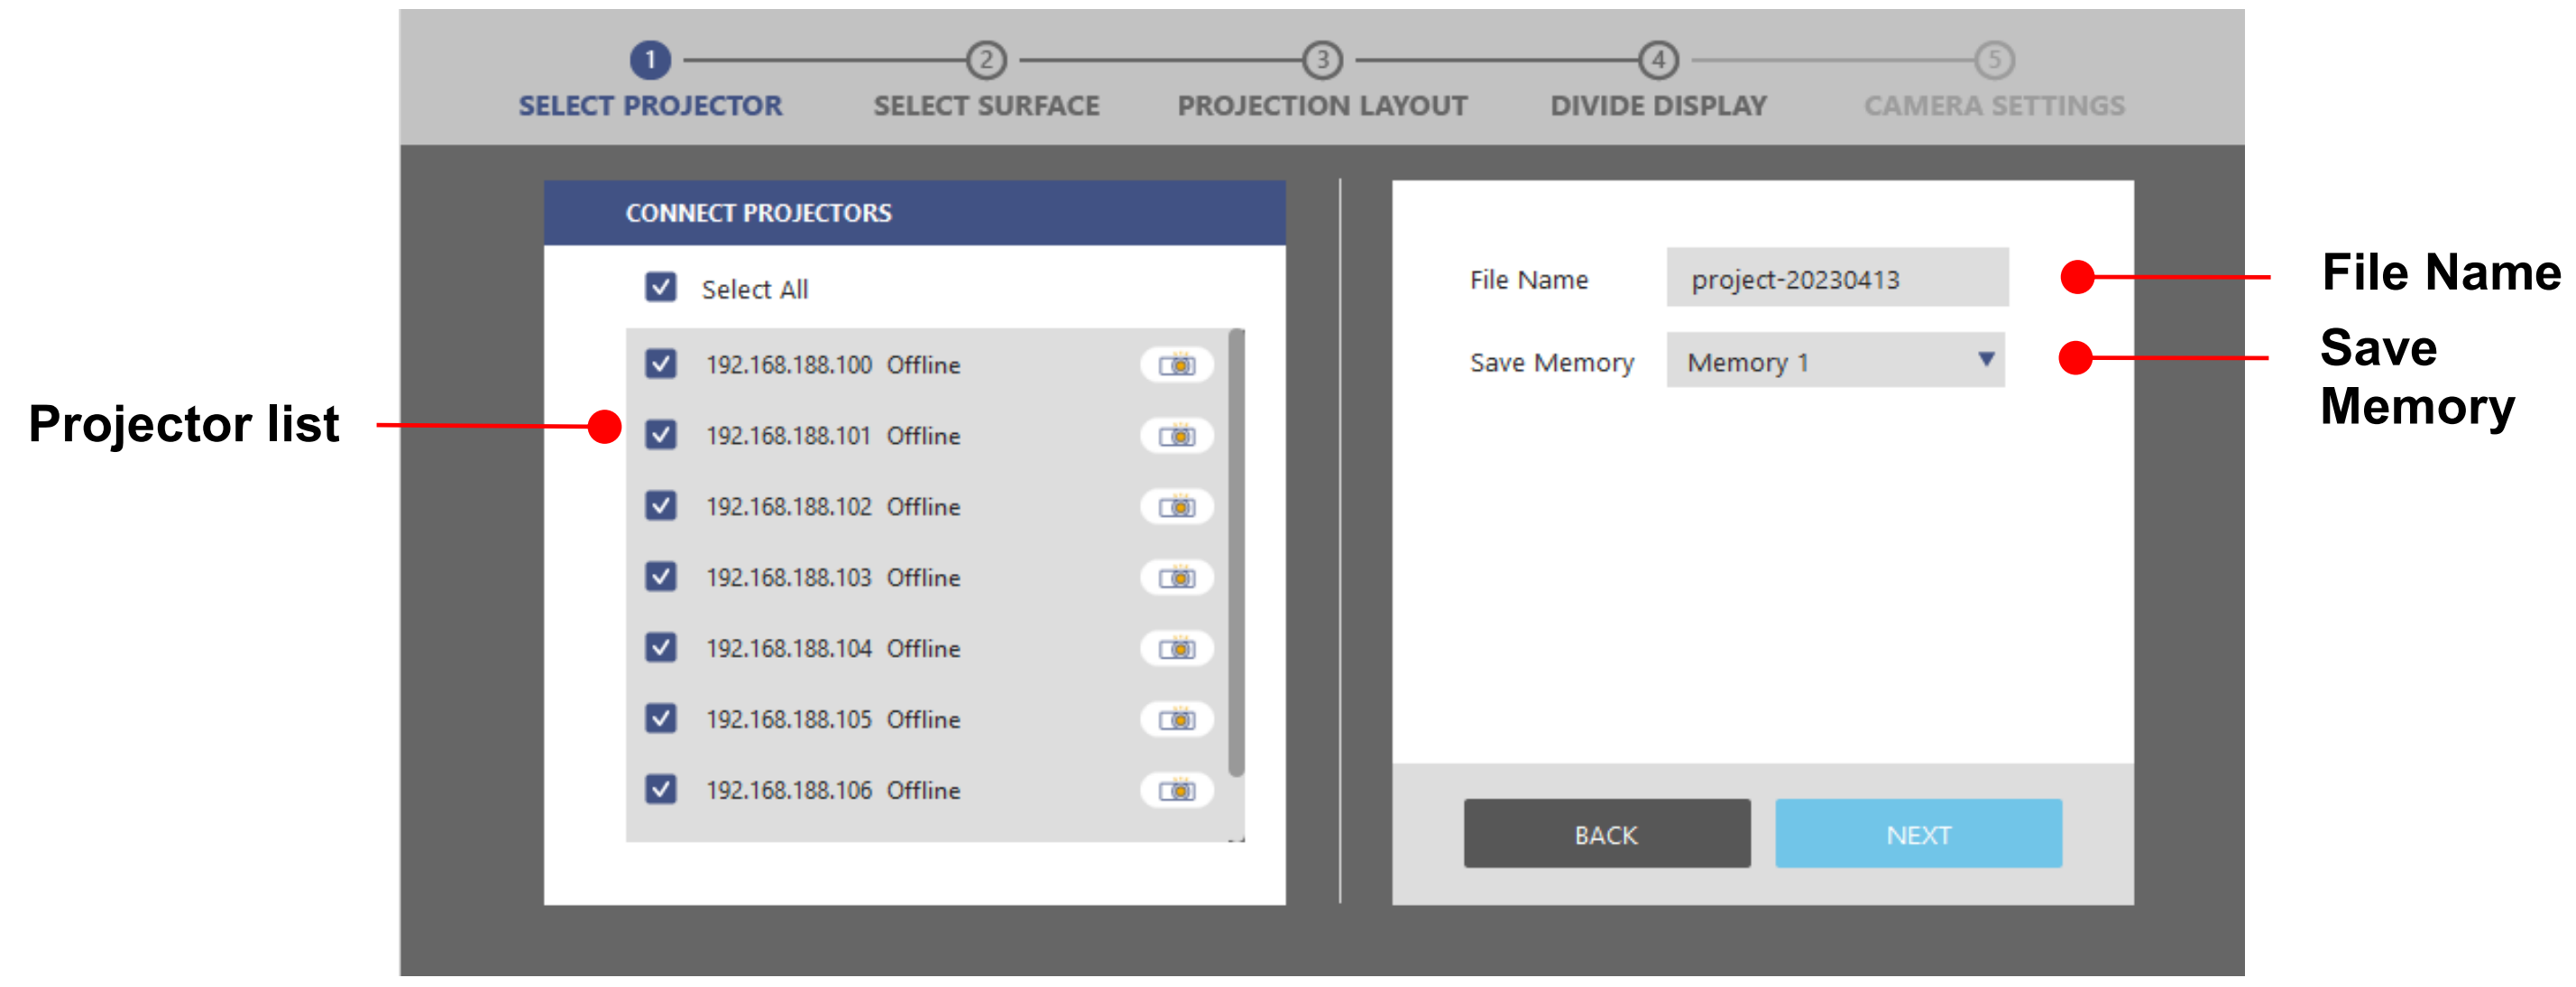
Projector Grouping
- Double check the selected projectors are correct.
- At the File Name field, type in the name for your file.
- At the Save Memory field, select a location to save the software settings.
- The save memory corresponds to the projector’s warp and blend memory. To load the settings from the projector OSD menu, select Display > Geometric Correction >Warp and Blend Control > Memory.
- Click NEXT to arrange the projectors.
Setting the surface mode and layout
Scenario Setting
- Select a surface mode based on the installation requirements.
- On the layout settings column, set the values of Height, Width or Stack. This specifies the number of projectors on the vertical and horizontal direction. The sum of the values should match with the total number of the selected projectors.
- After setting up the projector layout, click NEXT to select a projection mode.
Setting the projection layout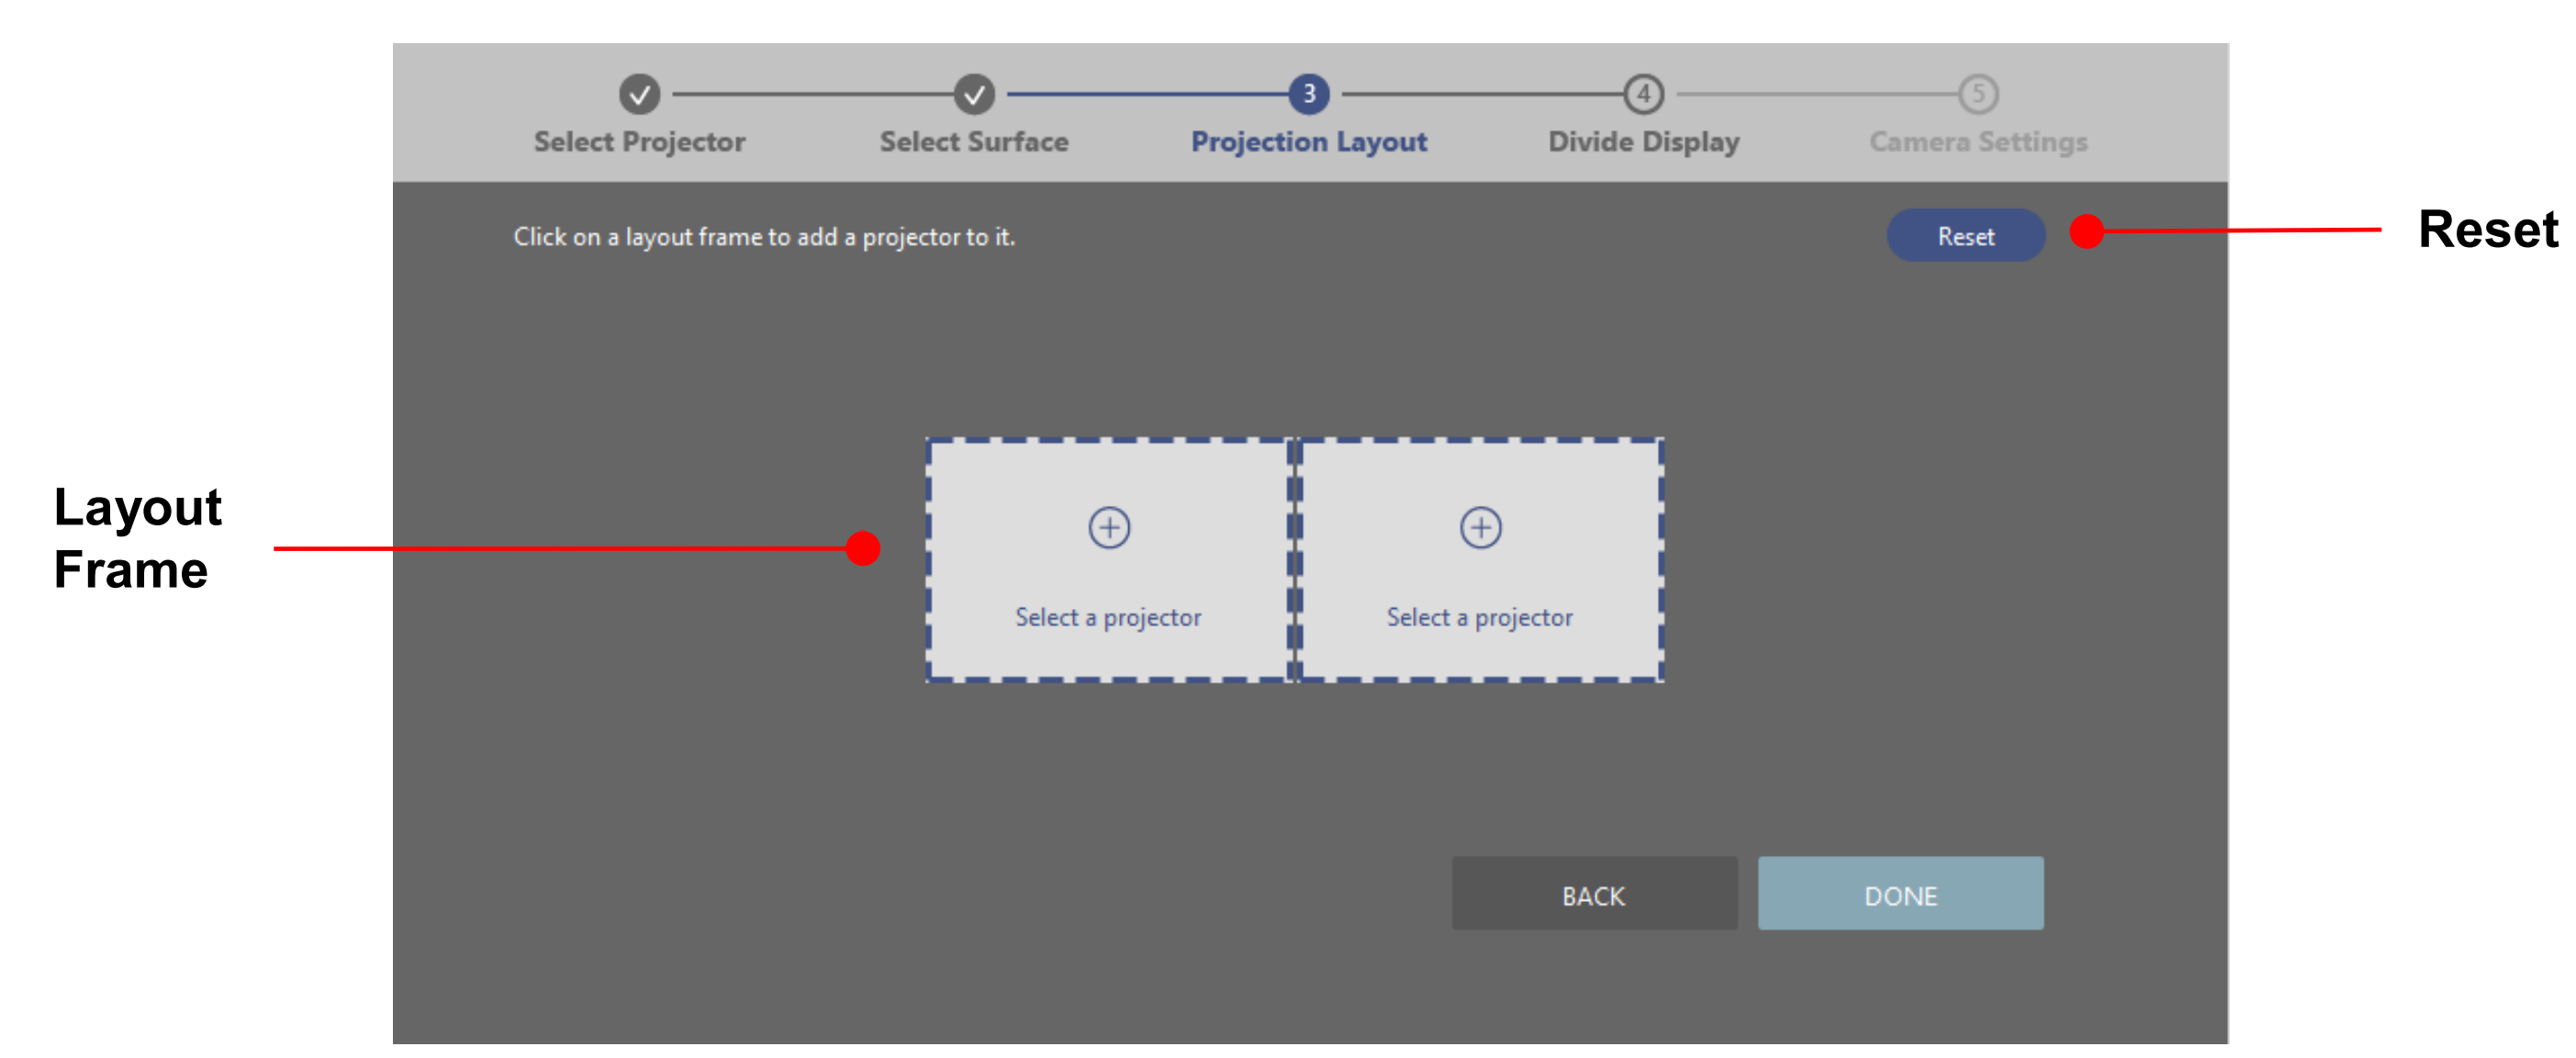
Select projectors layout
- Click on one of the layout frames, and a projector list dialog pops up.

- Select a projector, and click OK.
- To locate a projector, click the Identify button to project a white test pattern. Click the button again to turn off the test pattern.
- Repeat step a and b to select a projector for each frame. Make sure that the layout of the projectors are matching with the actual installation positions.
- To clear the selected projectors, click Reset.
- Click DONE to complete the projector arrangement.
- After this step, you can not change the projector layout settings anymore.

III. Workspace basics
Learn about the basics of the main workspace and shortcuts of Visual Suite.
Main workspace
Visual Suite is designed with an intuitionistic and user-friendly interface, allowing the user to effectively perform advanced geometric adjustments on the projected images.
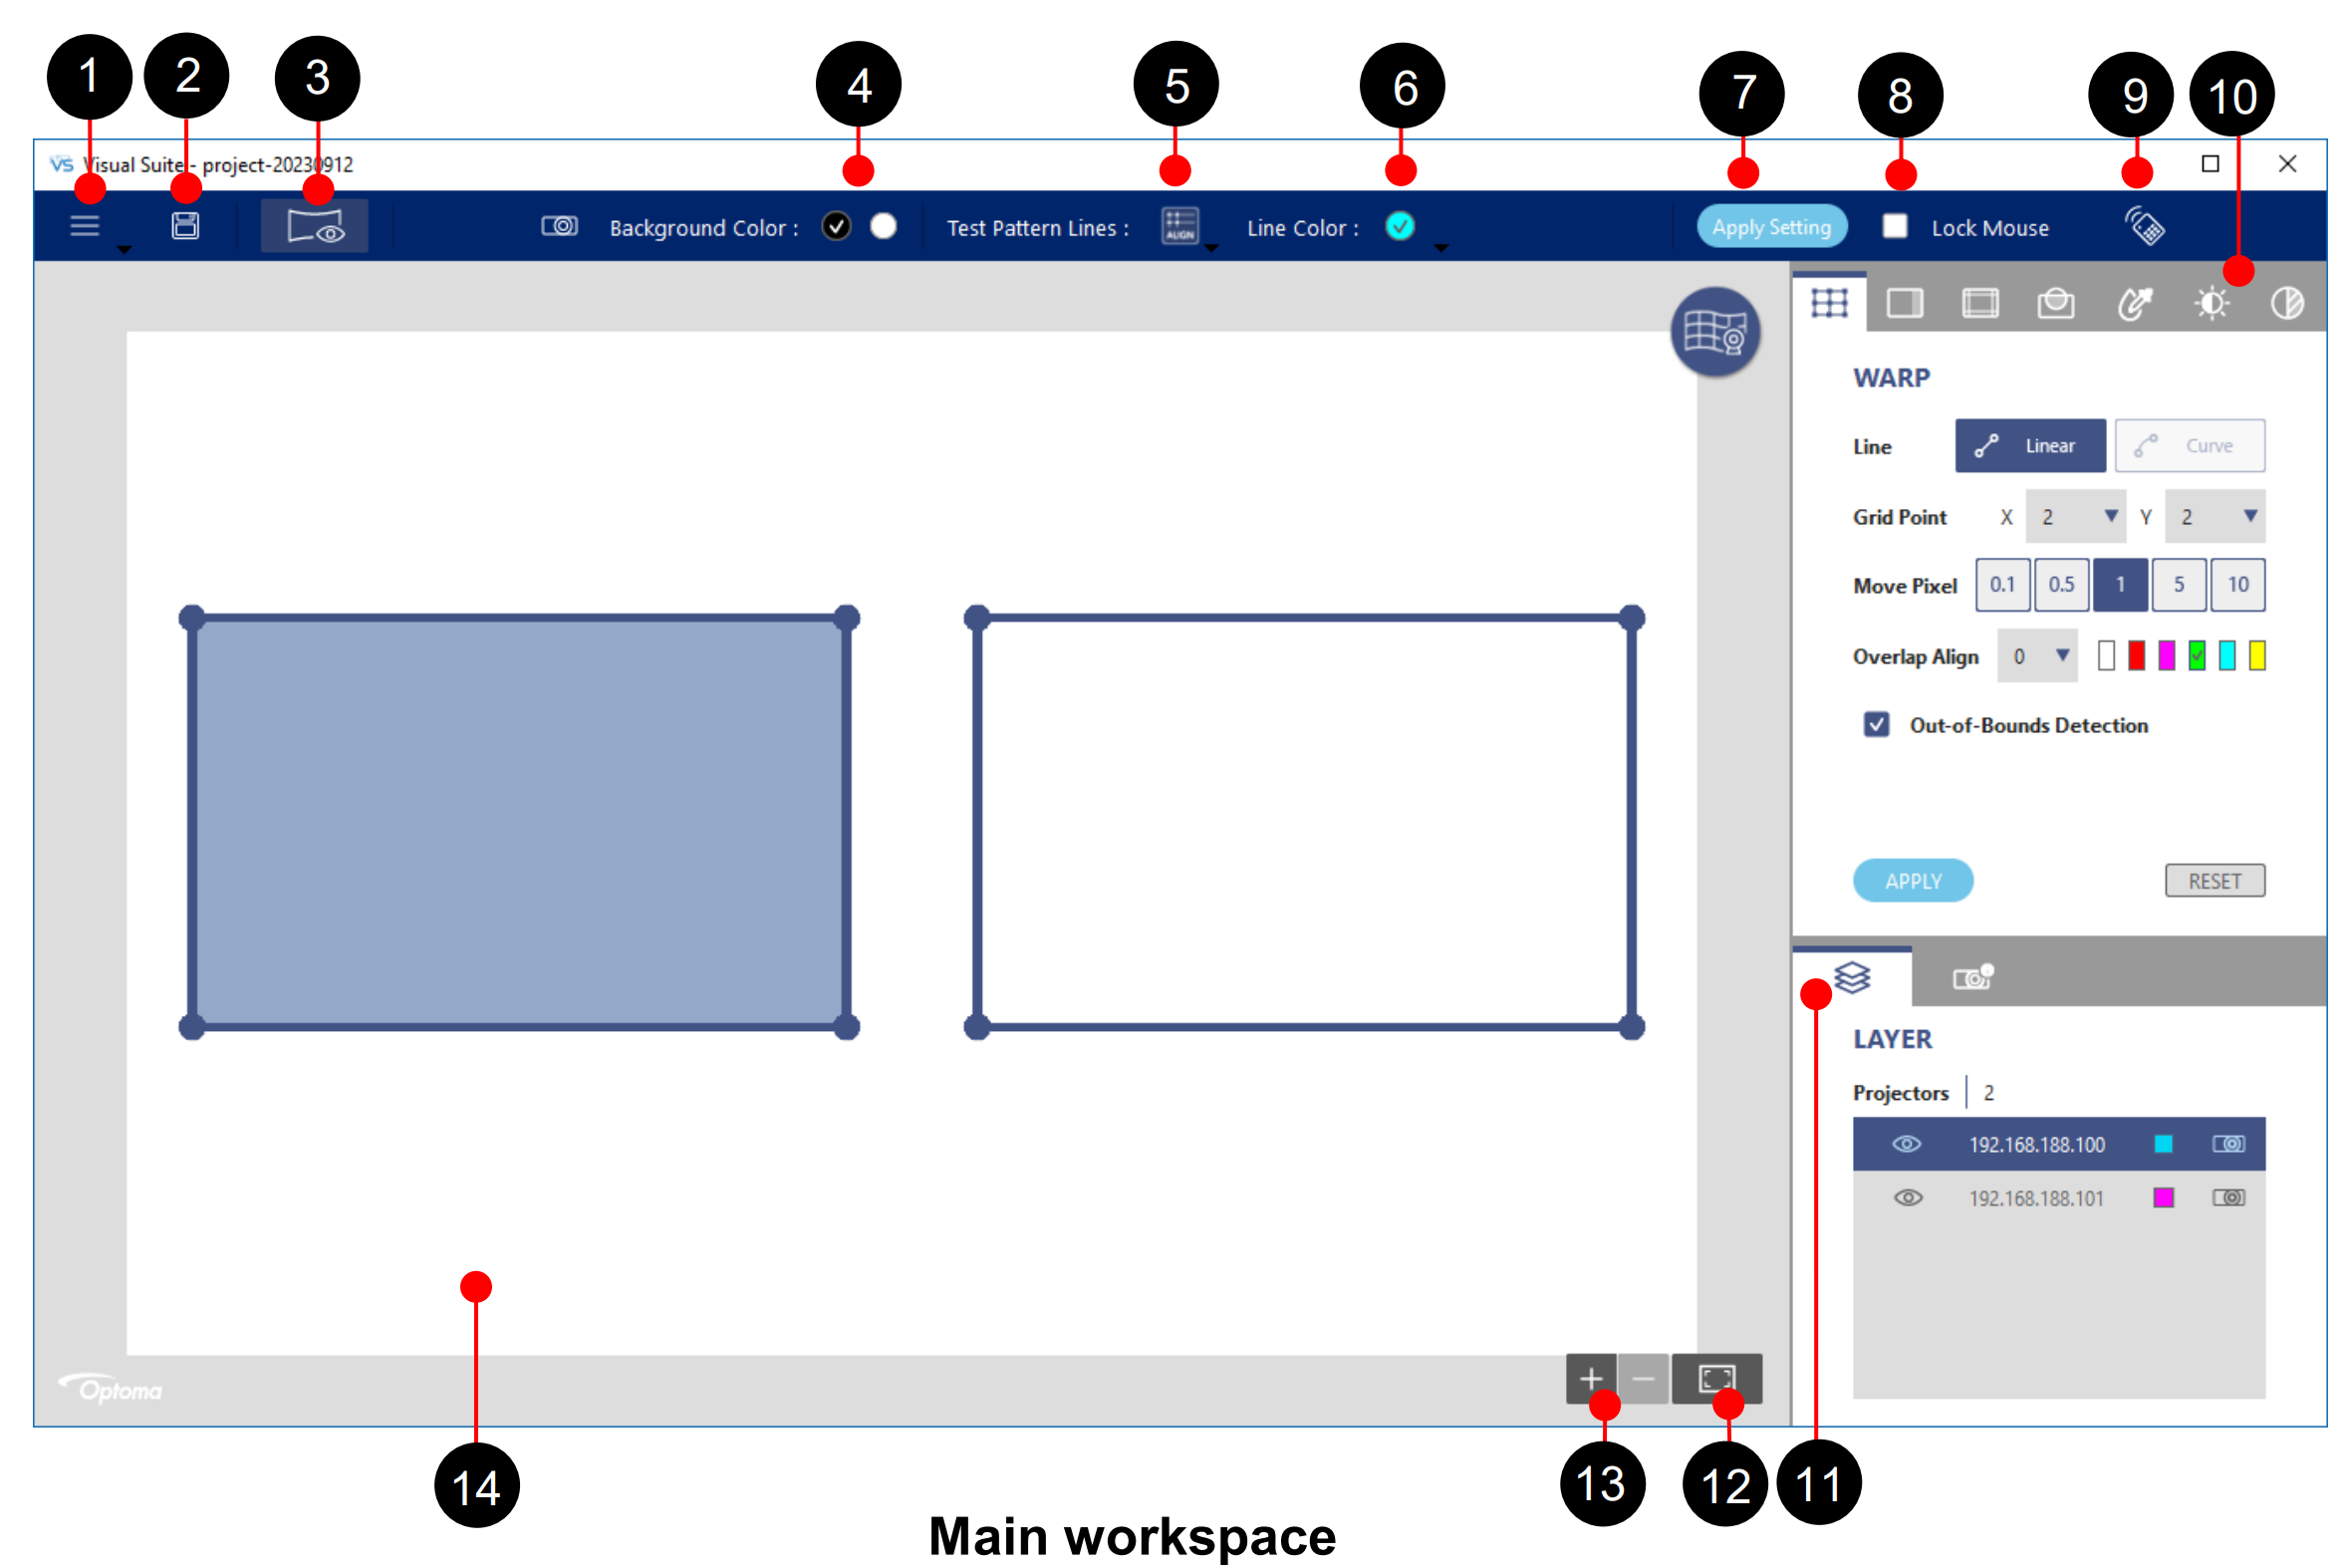
| No. | Function | Description |
| 1 | File – New Project – Open from PC – Open from Projector – Projector Memory – Save – Save as – Reset All – Language – Log File – Help- Quit |
The file menu contains commands relating to the handling of files. Create a new configuration file. Load the saved file or configuration from PC. Load the saved file or configuration from Projector. Memory location selection. Save the settings to the current file. Save the settings as a new file. Reset all setting. Language selection, English/Simplified Chinese/Traditional Chinese Save the log file. Provide information of software version, keyboard shortcuts and Onboarding scree. Exit the application |
| 2 | Save | Save the settings to the current file. |
| 3 | Preview | Project an image to view the result of current adjustments. |
| 4 | Background Color | Set the screen background to black or white |
| 5 | Test Pattern Lines | Set up the grid test pattern. – Select 0 to disable the test pattern – Set the number of test pattern lines to 5×5, 10×10 or 20×20. – Select ALIGN to align the lines with the grid points. – Select Contour to draw lines on the projection contour. |
| 6 | Line Color | Select a color for the test pattern lines. |
| 7 | Apply Setting | Function enable and auto apply for all projectors. – Warp – Blend – Black Level – Mask – Hotspot Reduction |
| 8 | Lock Mouse | Lock the warp operation via mouse |
| 9 | Remote Control | Projector Control Items as remote control operation |
| 10 | Function tabs | Select a function of image adjustment. |
| 11 | Layer | Provide a list of projectors shown on the canvas |
| 12 | Fit | Click the button to return the canvas to its original size. |
| 13 | Zoom in/out | Click + to zoom in the canvas, and click – to zoom out. |
| 14 | Canvas | An editing area to perform image adjustments. Click on one of the layout frame to select a projector, and the selected frame turns to light pink. |
Keyboard shortcuts
Visual Suite is preset with a series of keyboard shortcuts that provide a quick and efficient way to perform an action. You can fine the shortcut information at File > Help > Keyboard Shortcuts
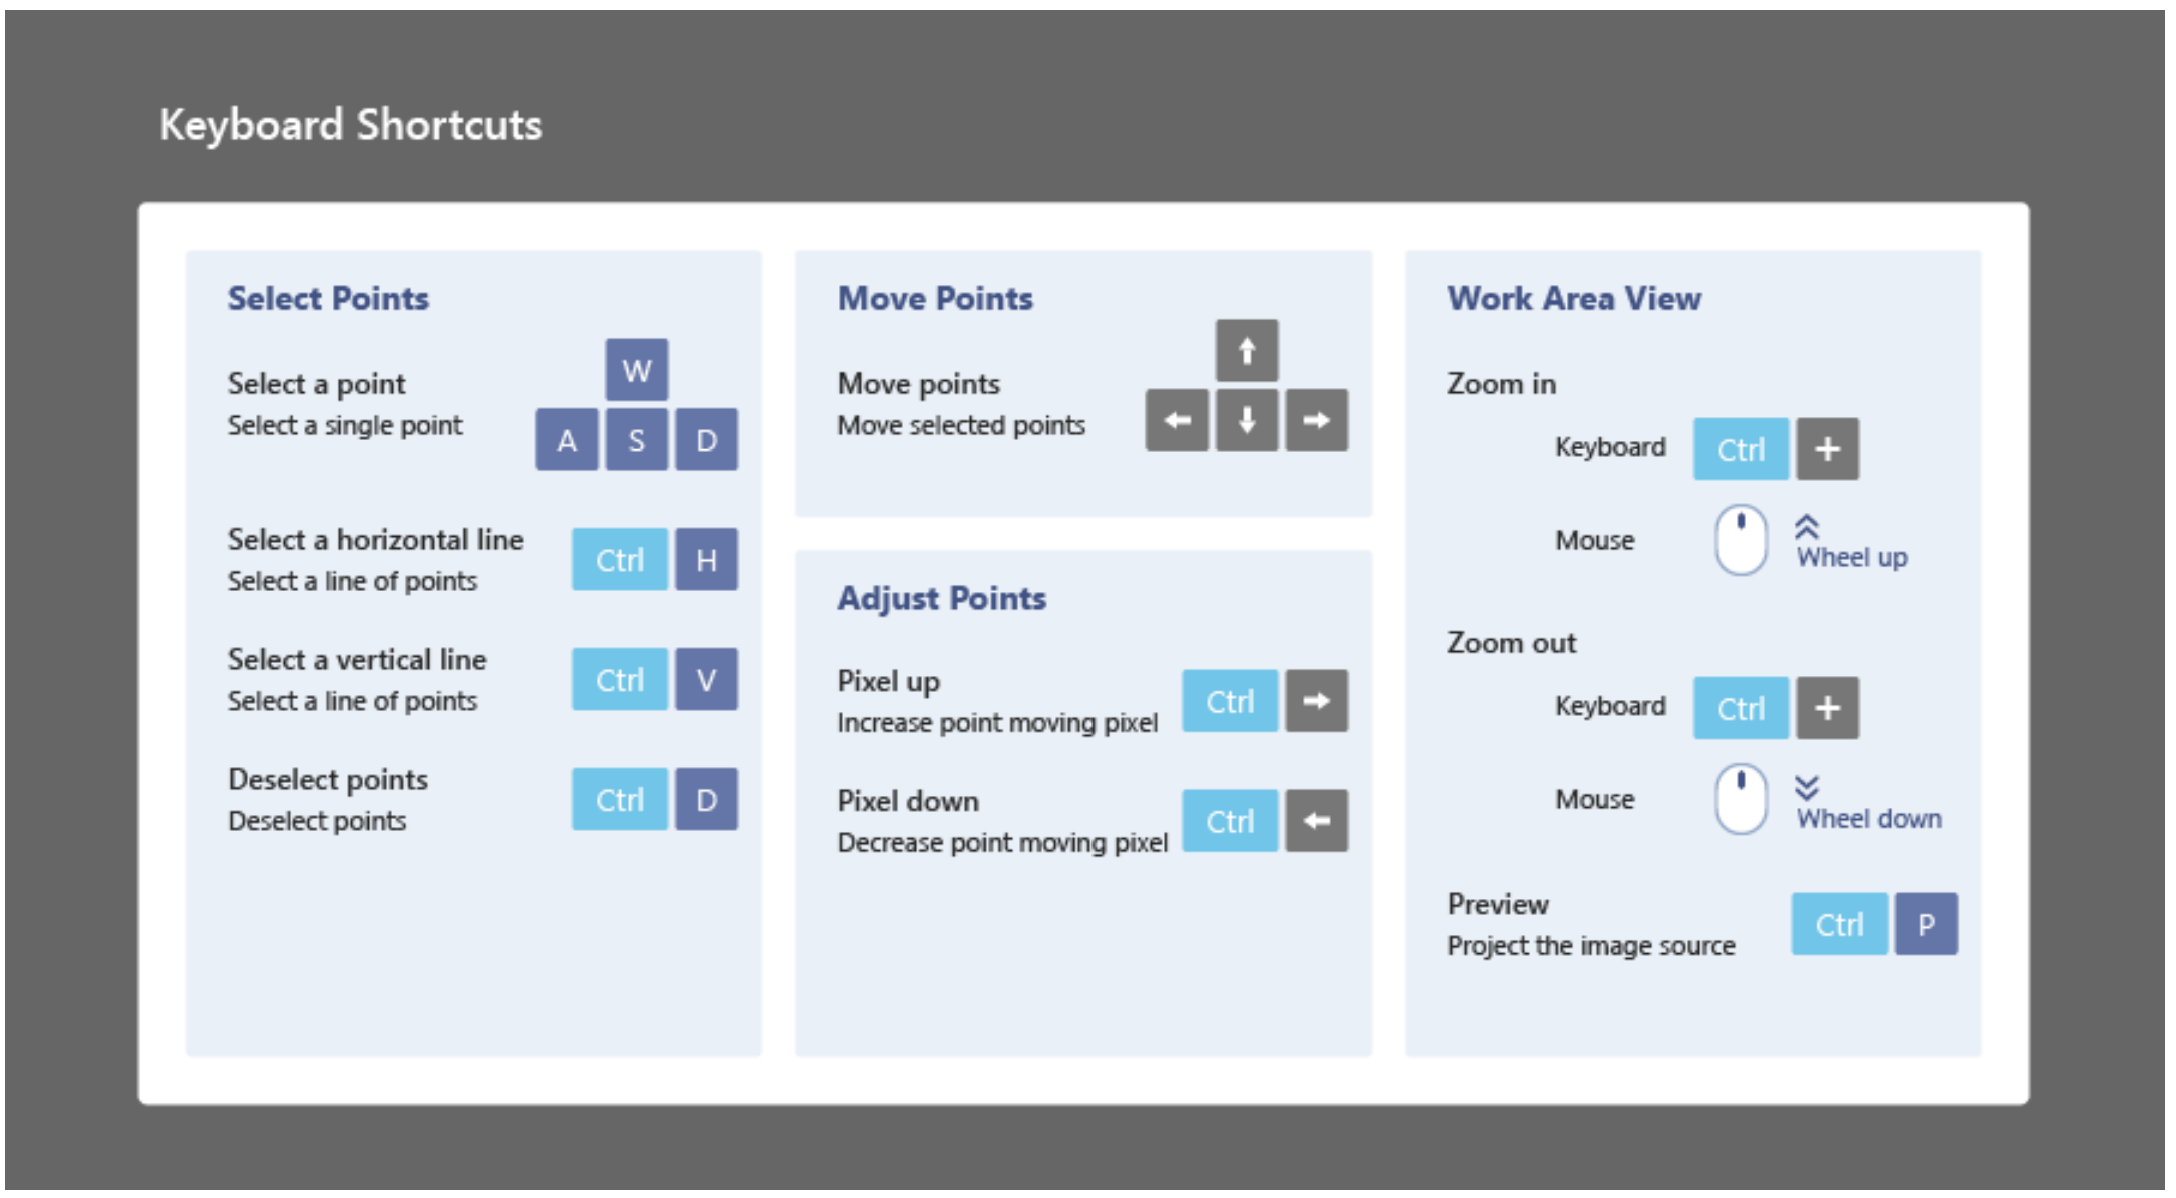
Keyboard shortcuts
| Shortcuts | Function |
| W, A, S, D | Select a point on the grid |
| Ctrl + H | Place the cursor anywhere on a horizontal line, and press Ctrl and H to select the entire line. |
| Ctrl + V | Place the cursor anywhere on a vertical line, and press Ctrl and V to select the entire line. |
| Arrow Keys | Move the selected control point |
| Ctrl + Up arrow | Increase the pixels that the point moves each time |
| Ctrl + Down arrow | Decrease the pixels that the point moves each time |
| Ctrl + Scroll wheel | Zoom in or zoom out the canvas |
| Ctrl + P | Project an image to view the result of current settings |
| Enter | Apply Warp / Black Level adjustment after change settings |